Creating a high-quality blog post isn’t as simple as writing all the proper words.
The way it’s formatted also makes a huge difference.
But before we get into formatting details, let’s start with the basics.
What Is a Blog Post Format?
A blog post format refers to the way you present your blog post’s ideas.
It covers elements like:
- How you present concepts. In text, image, or video form, for example.
- How you display key points. To emphasize their importance.
- The content’s structure. Which determines whether your blog post is easy to navigate and digest.
For example, the blog post below:
- Has a subheading that describes the subtopic
- Uses a numbered list for step-by-step instructions that are easy to follow
- Bolds words that users need to click when following the post’s instructions
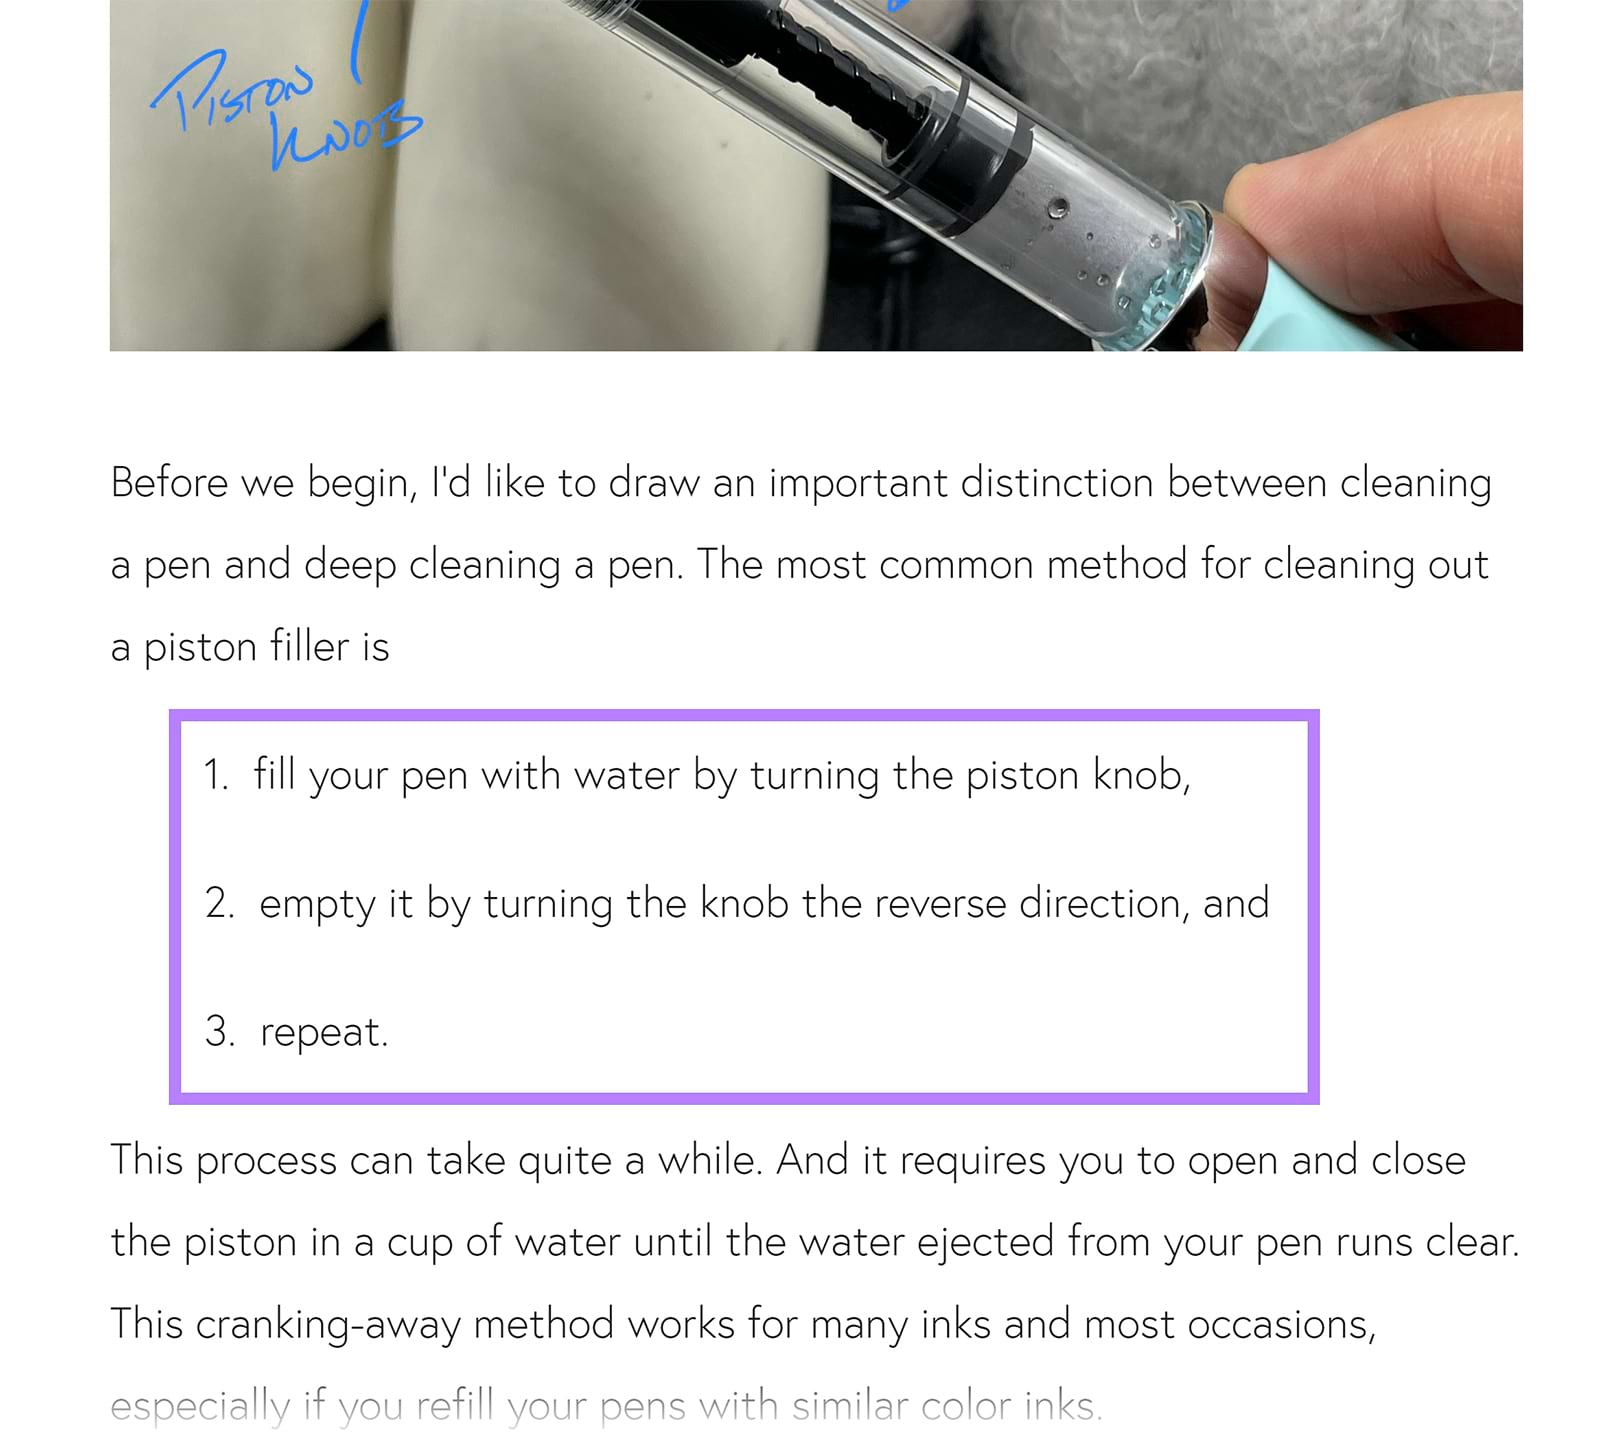
- Provides an image to support an instruction
Why Does Blog Post Formatting Matter?
The format of a blog post affects:
- Whether the blog post is easy to skim. People often scan posts to see if it satisfies their needs. And good blog post formatting can make this easier.
- The amount of time users spend engaging with the post. Effectively formatted posts are simpler to digest, holding readers’ attention for longer.
- The blog post’s ability to communicate concepts. Formatting certain blog ideas in image or chart form, for example, can help readers understand them better.
All this influences the blog post’s potential for generating conversions (i.e., desirable actions like account registrations).
For example, compare these two variations of the same text:
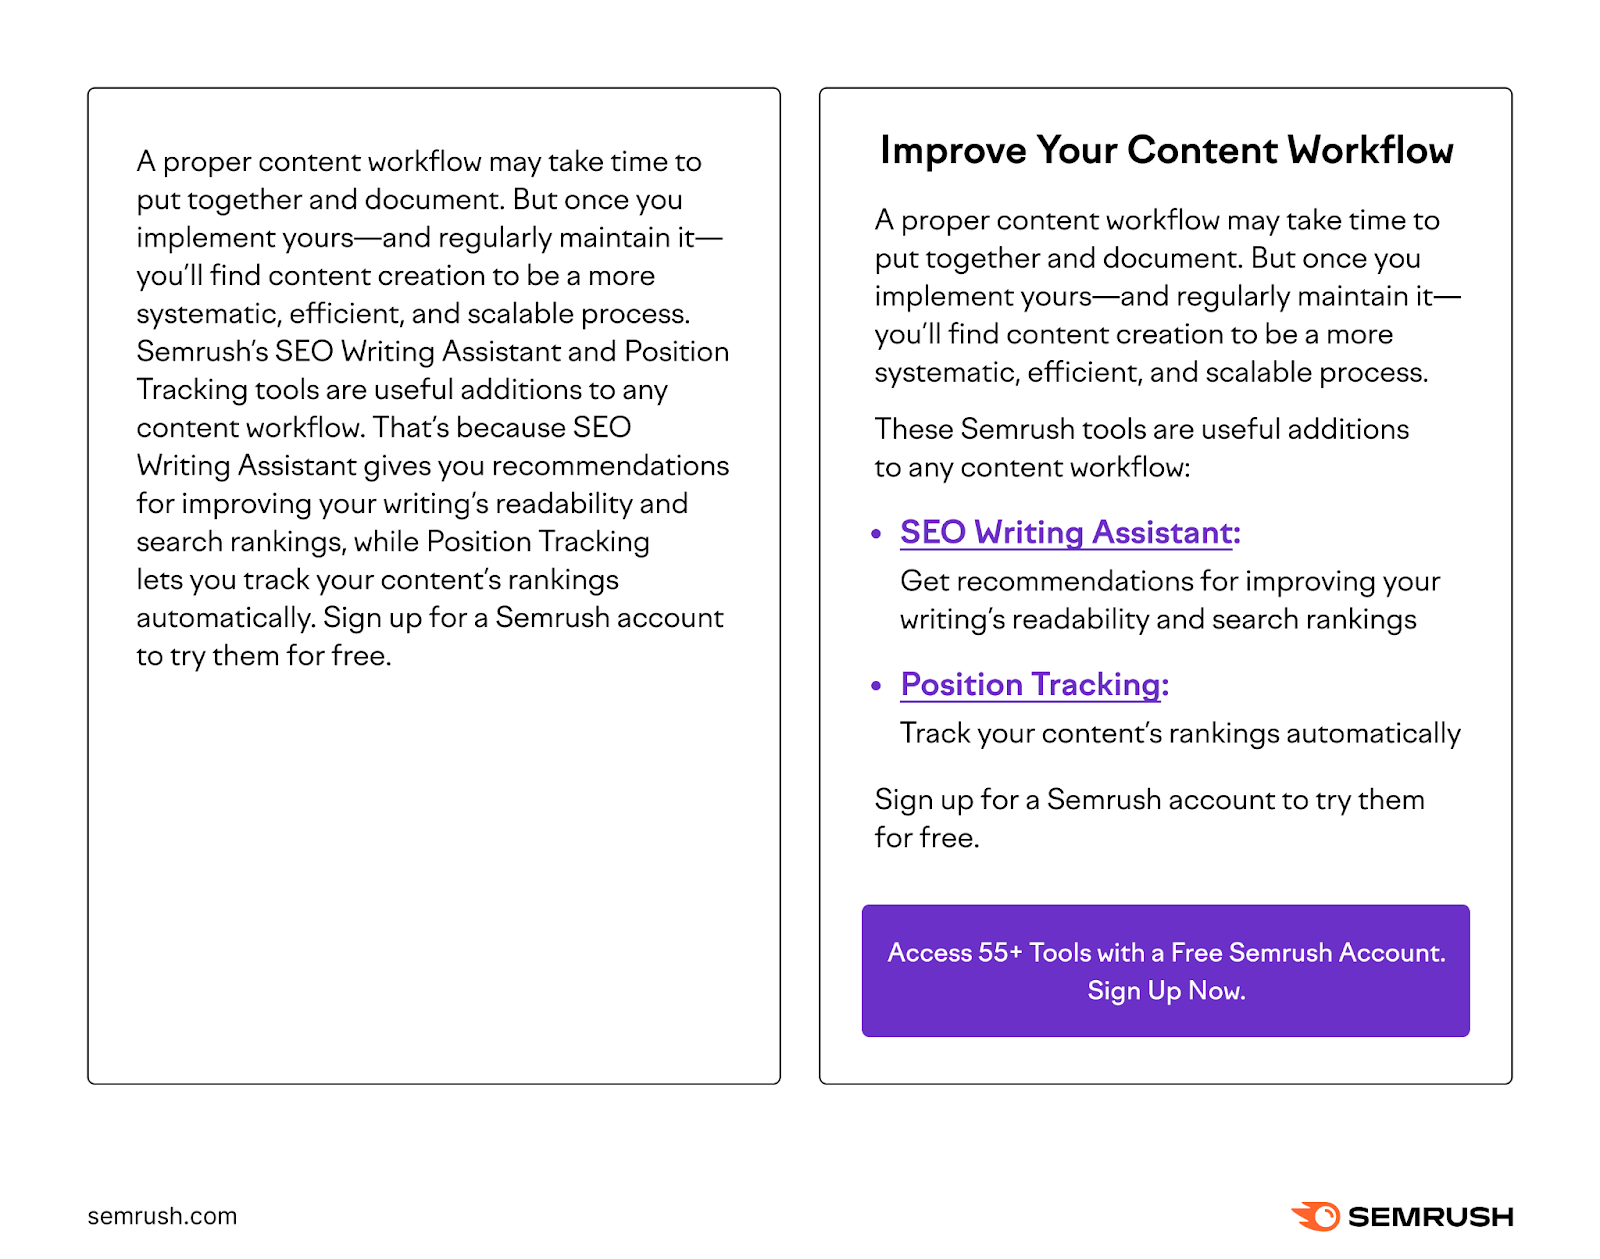
The version on the left is an unformatted chunk of text that seems daunting and off-putting to read. Its call to action (CTA) also doesn’t stand out, which could harm its conversion rate.
Meanwhile, the version on the right is well-formatted with a heading, line breaks, a bulleted list, and a CTA banner. It’s easier to read and could attract more conversions.
How to Format a Blog Post
Here’s how to format a blog post to improve engagement and conversions:
1. Use Headings to Indicate Key Discussion Points
Use headings to break your content into sections. To summarize the content’s main idea, helping readers understand what they’ll learn from reading it.
For example, “1. Use Headings to Indicate Key Discussion Points” is this content section’s heading. And clearly spells out what will be discussed.
Readers can also skim a blog post’s headings. To get the gist of its content without reading it in full.
Adding Heading Tags to Your Headings
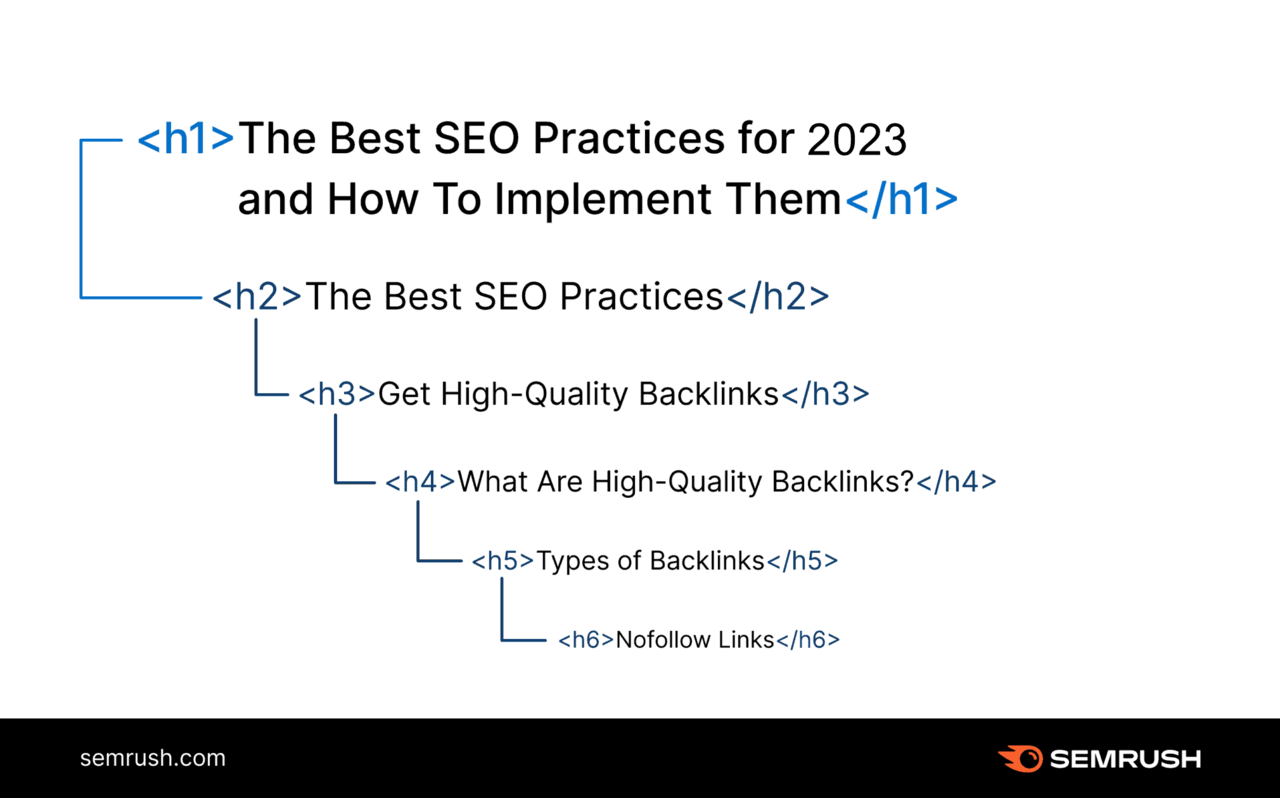
Add hypertext markup language (HTML) heading tags to differentiate the post’s headings from regular text. Which helps search engines understand your content’s structure and helps readers identify headings and their hierarchy.
The heading tags go before and after the intended heading. Like so:
<hX>The heading goes here</hX>
“X” is a number from one to six, depending on the heading’s hierarchy within the post:
- The H1 heading should represent the post’s title
- H2 headings signal the start of a main content section
- H3 headings indicate subtopics within a main content section
And so on.
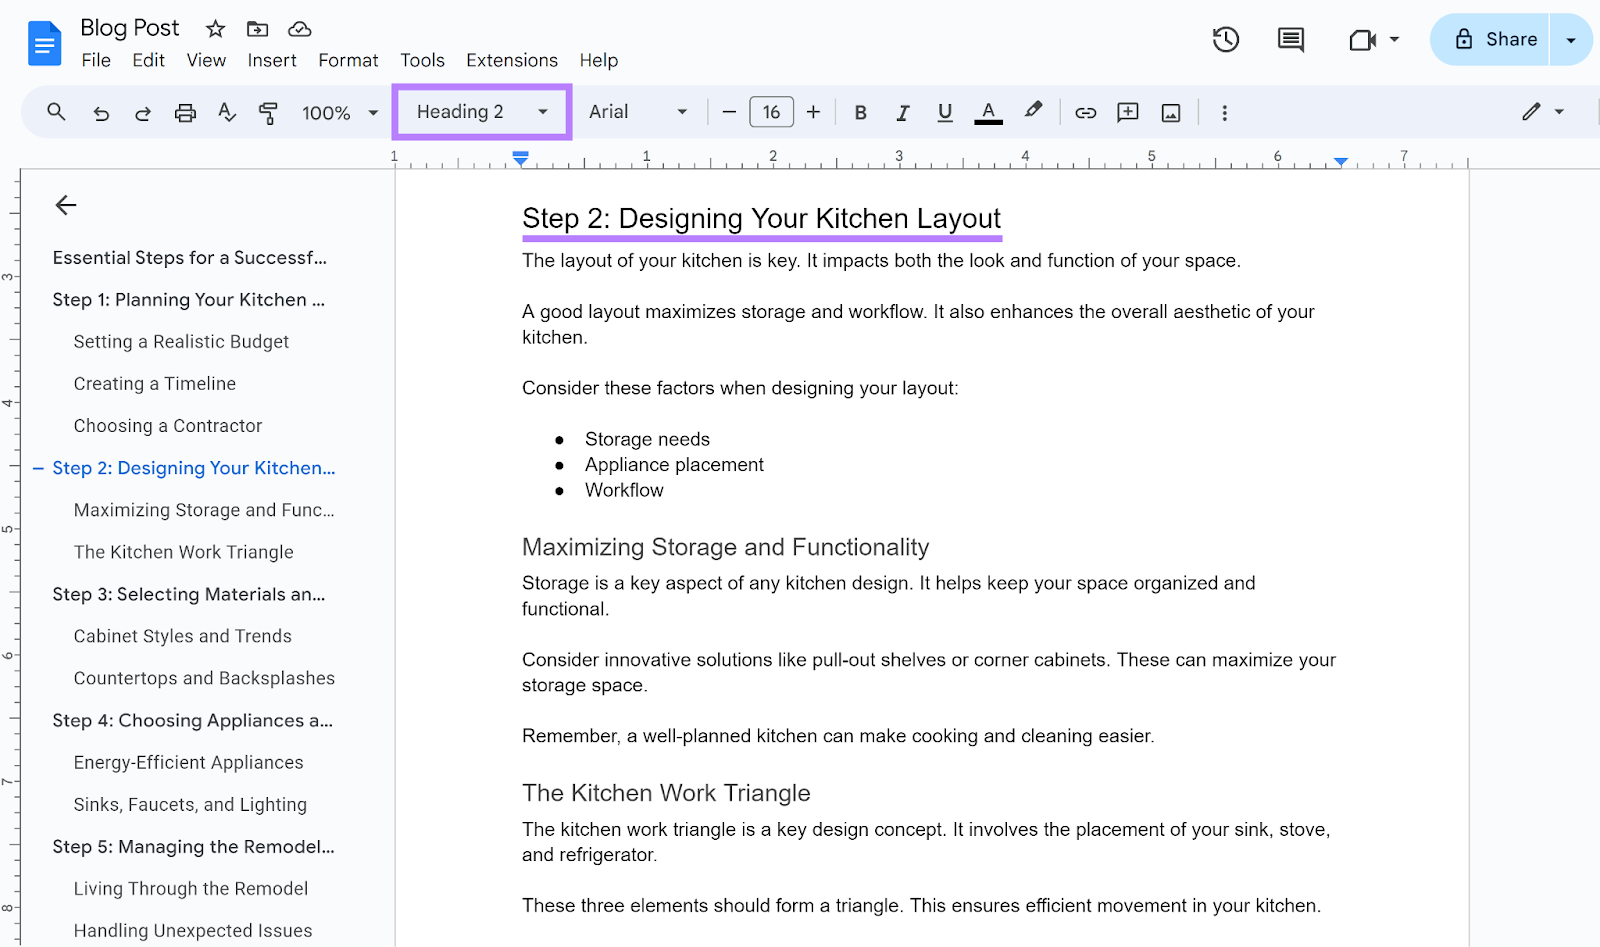
Most writing apps and content management systems (CMSs) make it easy to create heading tags.
For example, here’s what an H2 looks like in Google Docs:
And in WordPress:
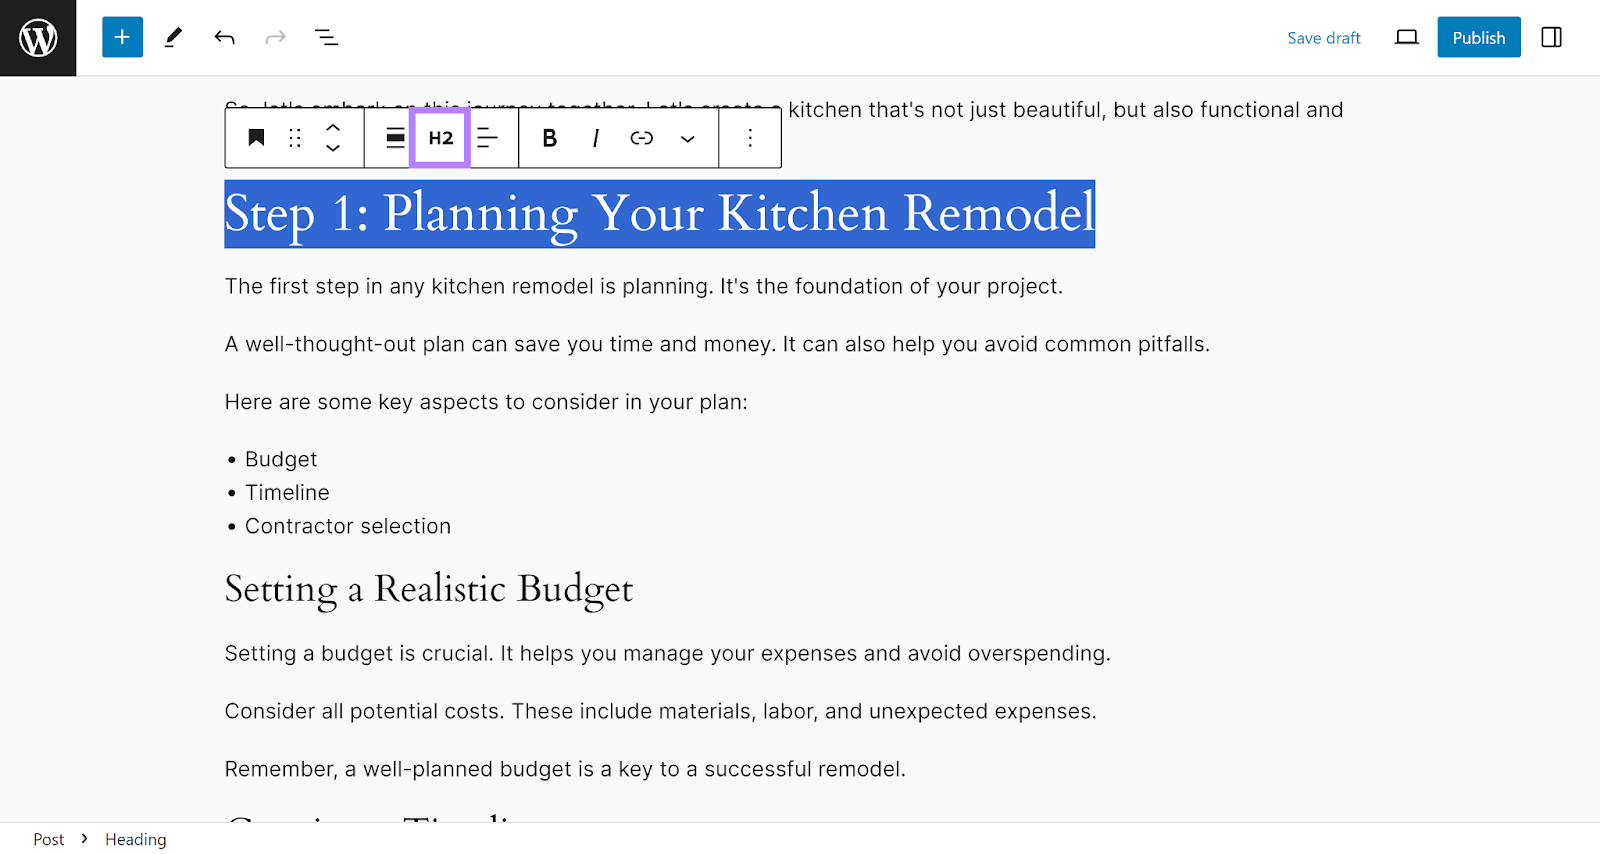
This means you don’t need to apply the HTML tags manually.
Creating a Table of Contents with Your Headings
A table of contents is a list of your post’s headings. It helps readers view all these headings at a glance. And decide whether your post contains the information they’re looking for.
For example, here’s the table of contents for our mobile advertising blog post:
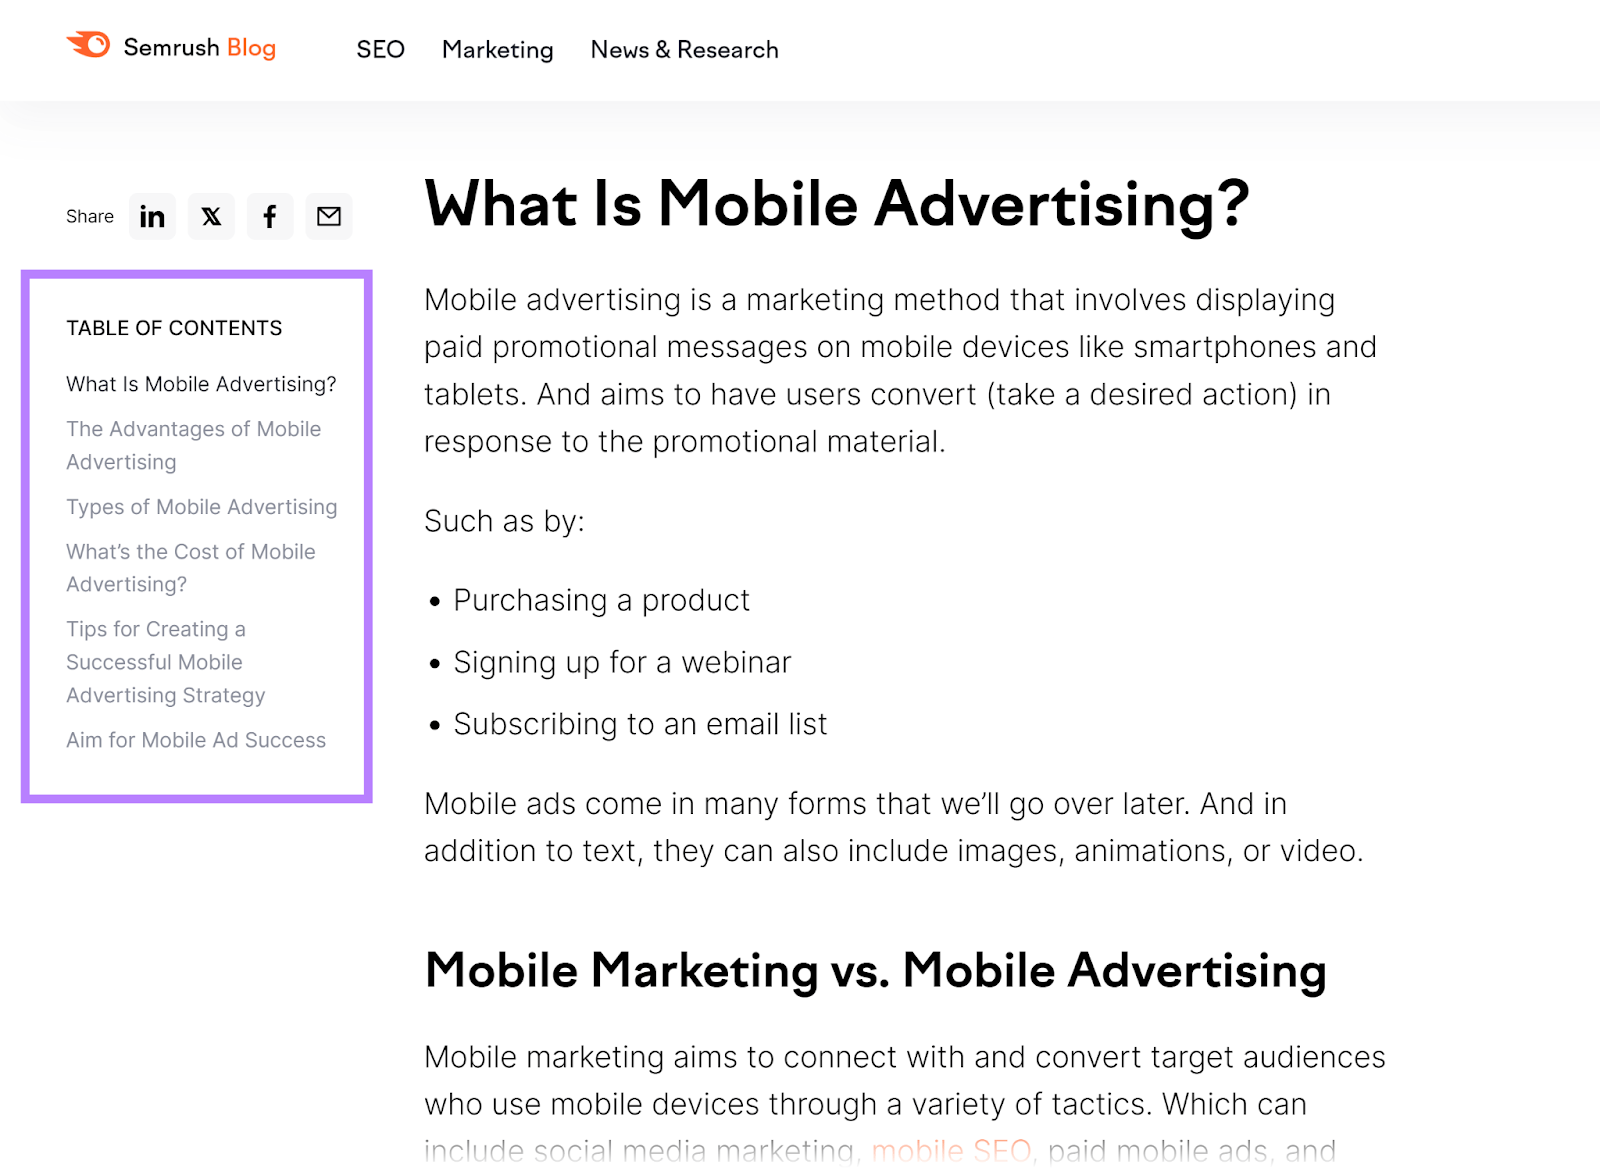
Each heading in the table of contents may also be a jump link. Letting people who click it skip directly to its content section.
If you’re creating a WordPress post, you can use the Easy Table of Contents plugin to add tables of contents to your posts.
2. Write Short Paragraphs and Sentences
Keep your paragraphs and sentences short. This makes your post easier to read and more visually appealing.
Shorten your paragraphs and sentences by:
- Making only one point per sentence. Split sentences with multiple points into multiple sentences.
- Avoiding fluff in your writing. Get to the point. Don’t include content that’s irrelevant to the discussion.
- Breaking up walls of text. Break up long paragraphs into multiple shorter ones with fewer points.
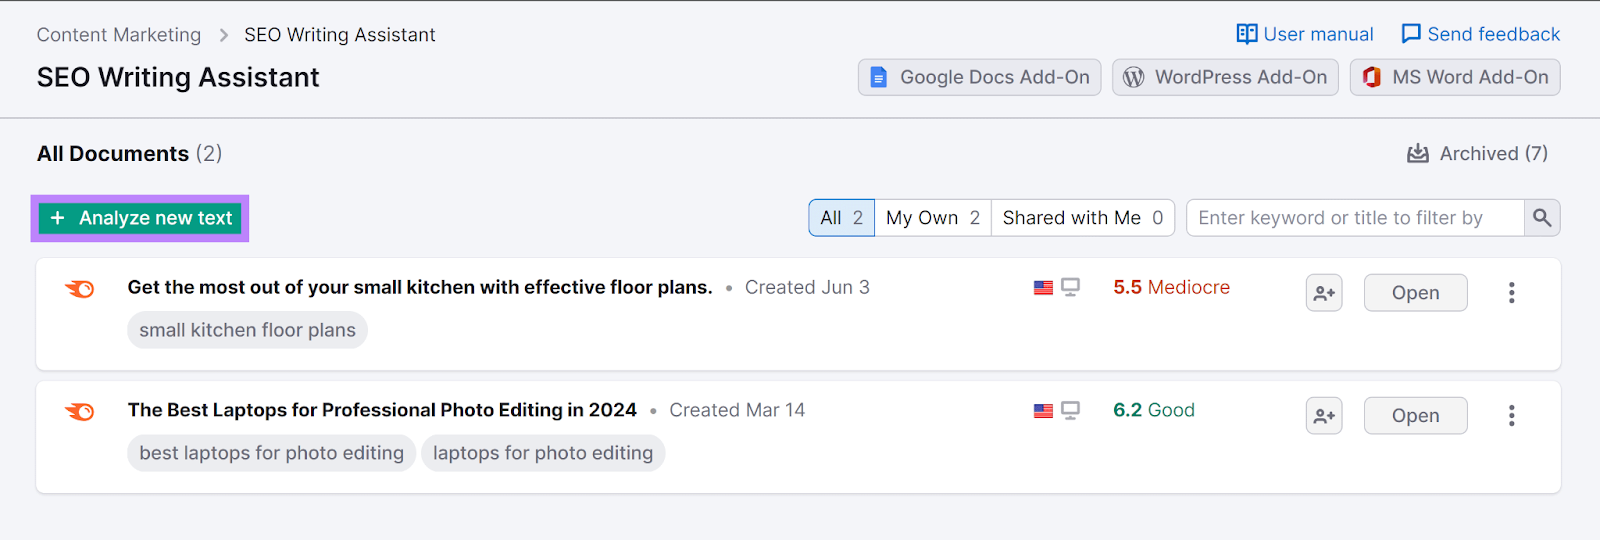
Use Semrush’s SEO Writing Assistant to check for and fix long paragraphs.
Log in to your Semrush account, and then click “Content Marketing” > “SEO Writing Assistant” in the left sidebar.
Select “+ Analyze new text.”
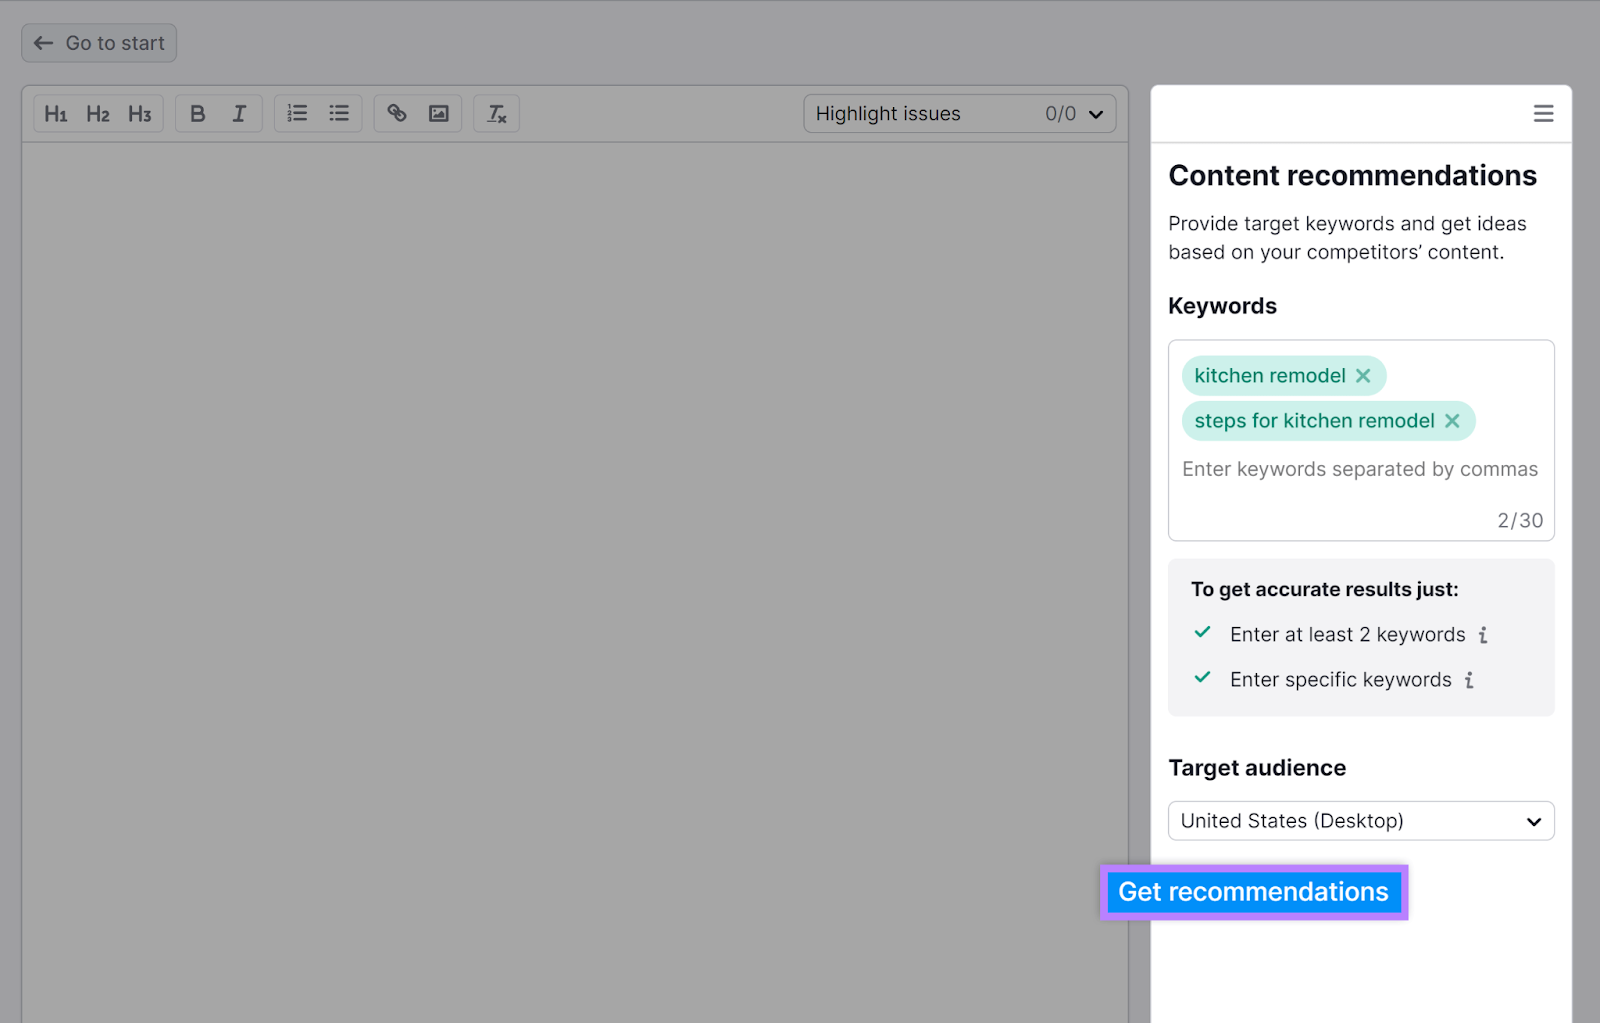
Click “Set a new goal” under the “Content recommendations” settings on the right. And fill out your blog post’s target keywords and target audience.
Then, click “Get recommendations.”
Next, type or paste your blog post draft into the editor.
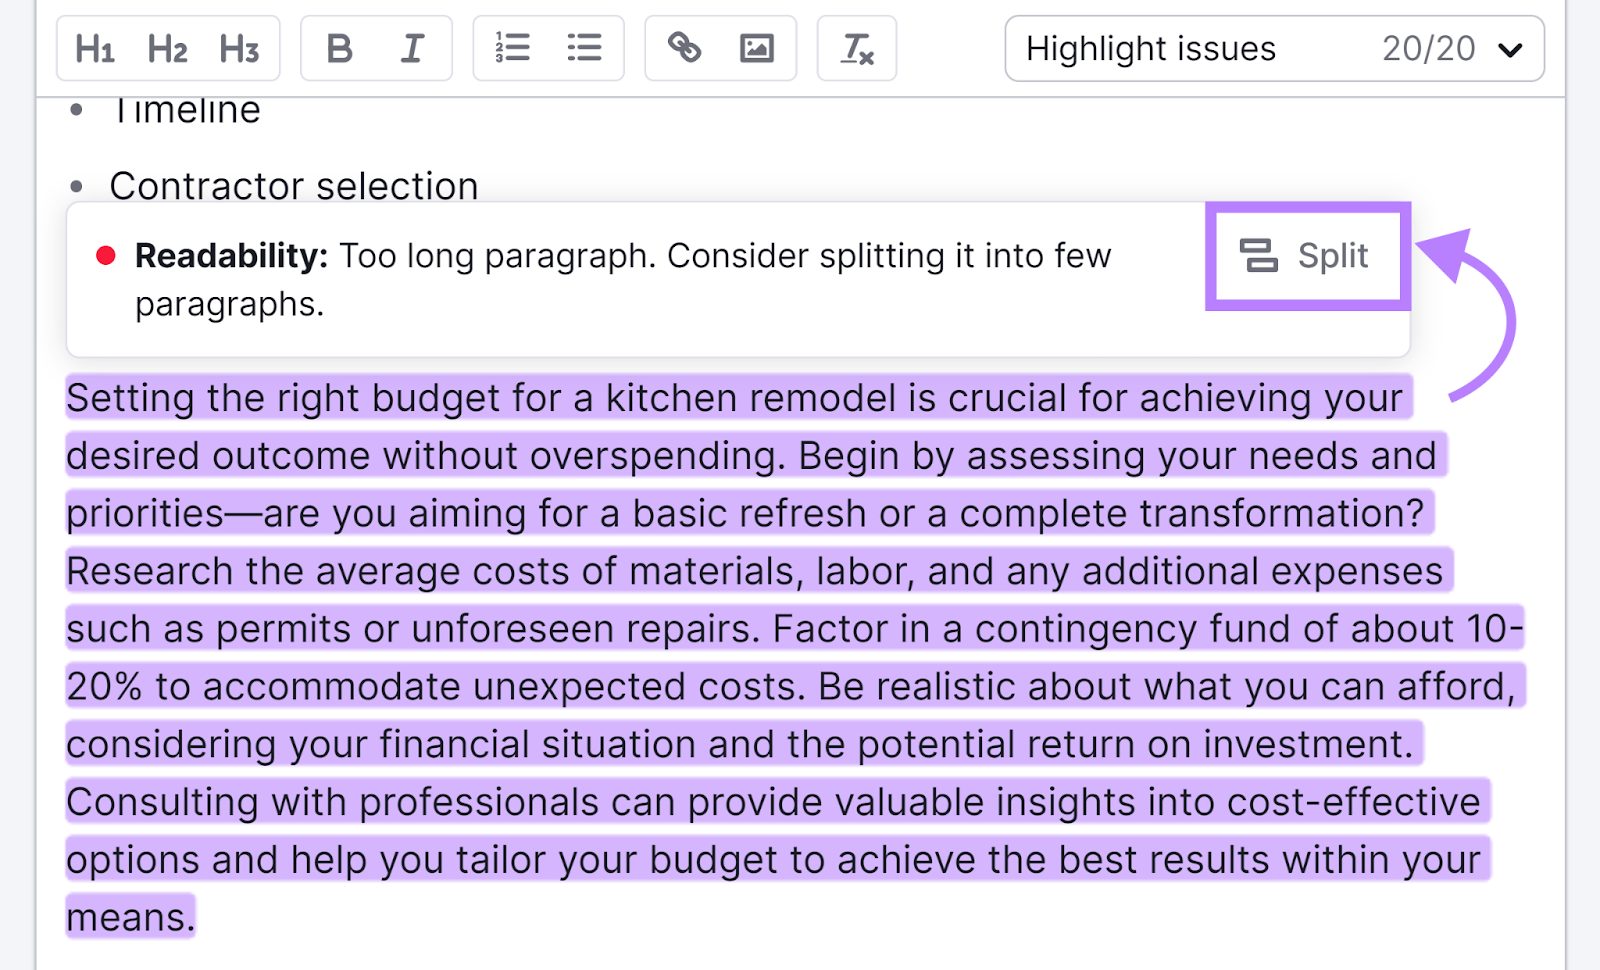
The SEO Writing Assistant will highlight any issues, including long paragraphs.
Click the highlighted text and then “Split” to have the tool fix the issue for you.
The right sidebar also identifies long paragraphs—and many other writing issues:
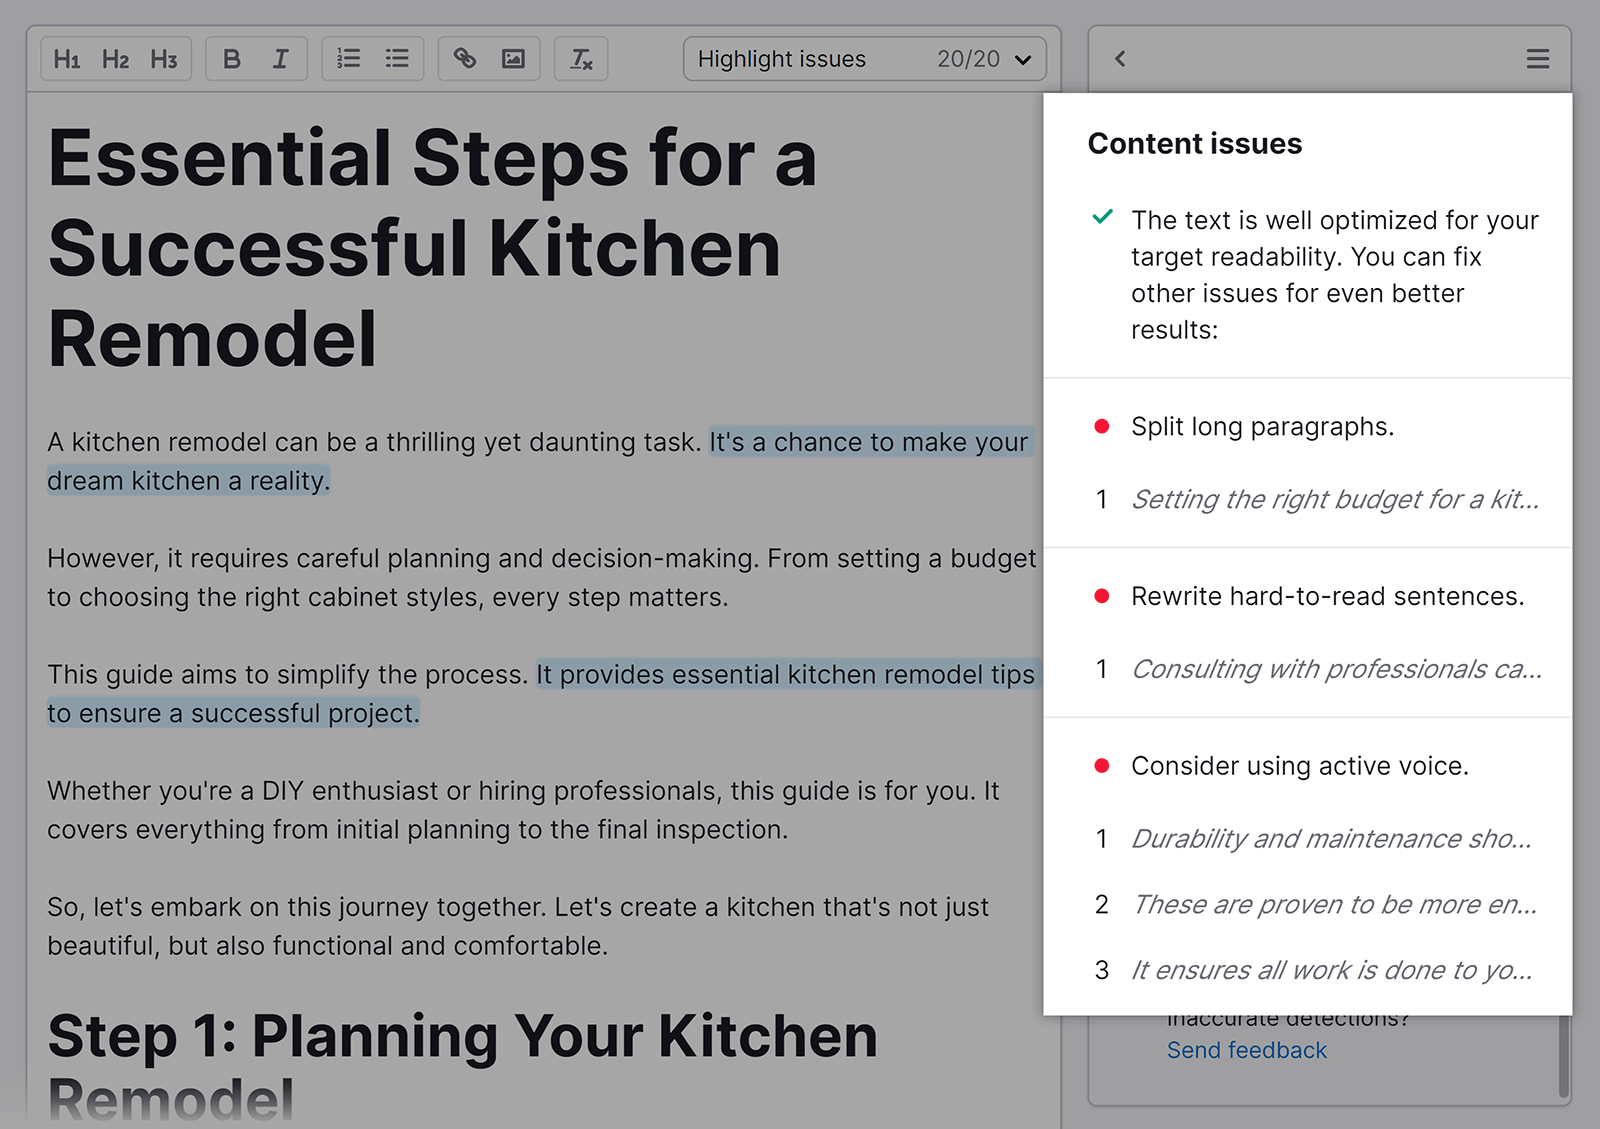
Make sure to review all the recommendations provided. So you can improve your blog post formatting and the writing itself.
3. Display Important Words in Bold
Use bold formatting to stress important ideas readers should pay extra attention to.
For instance, this Knitandnote blog post uses bold formatting to emphasize key details for each knitting pattern.
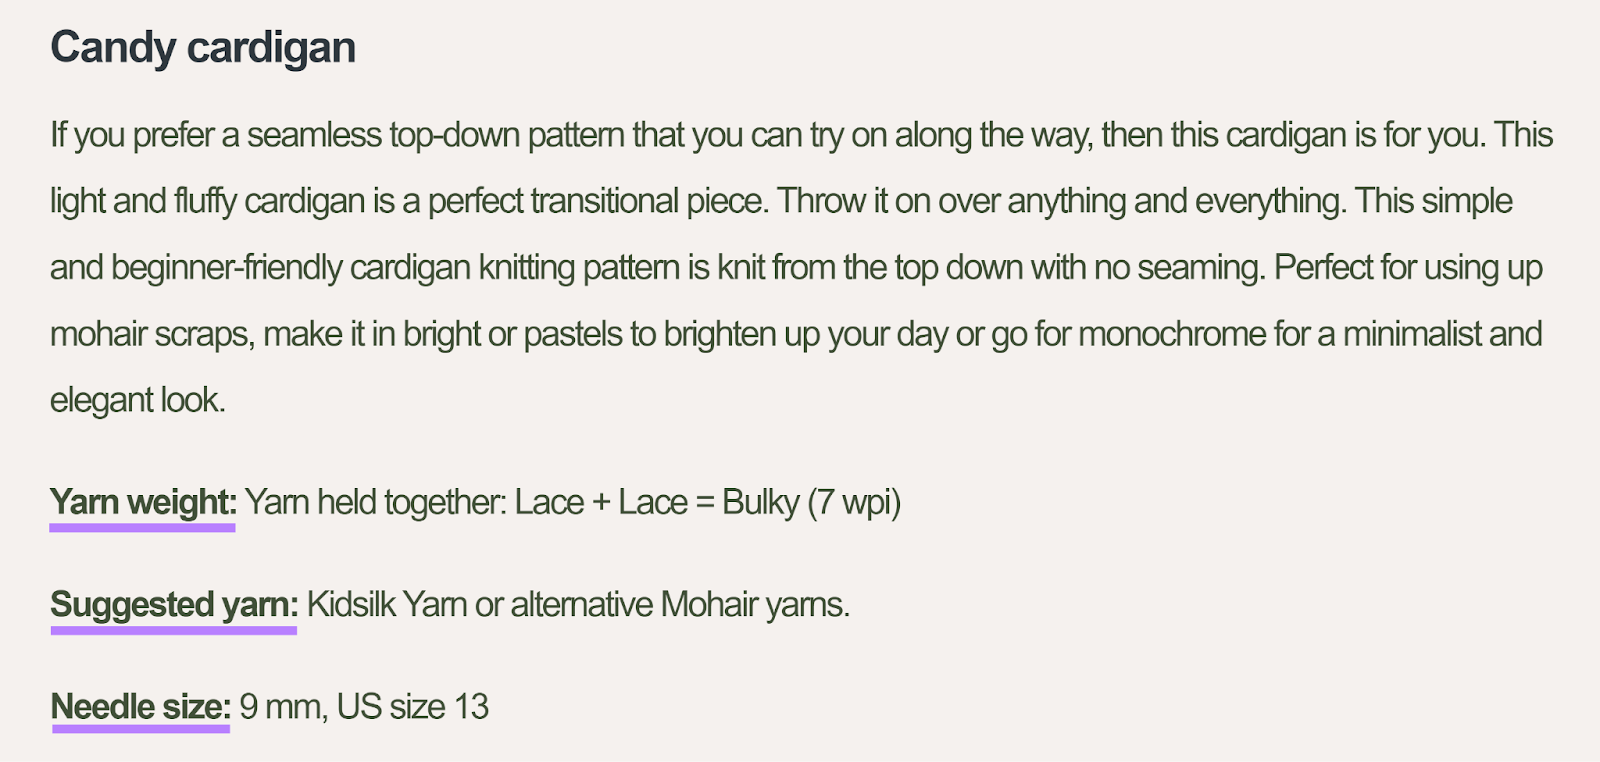
Bolded text looks thicker than unbolded text. So, it stands out on the page. And catches the reader’s eye.
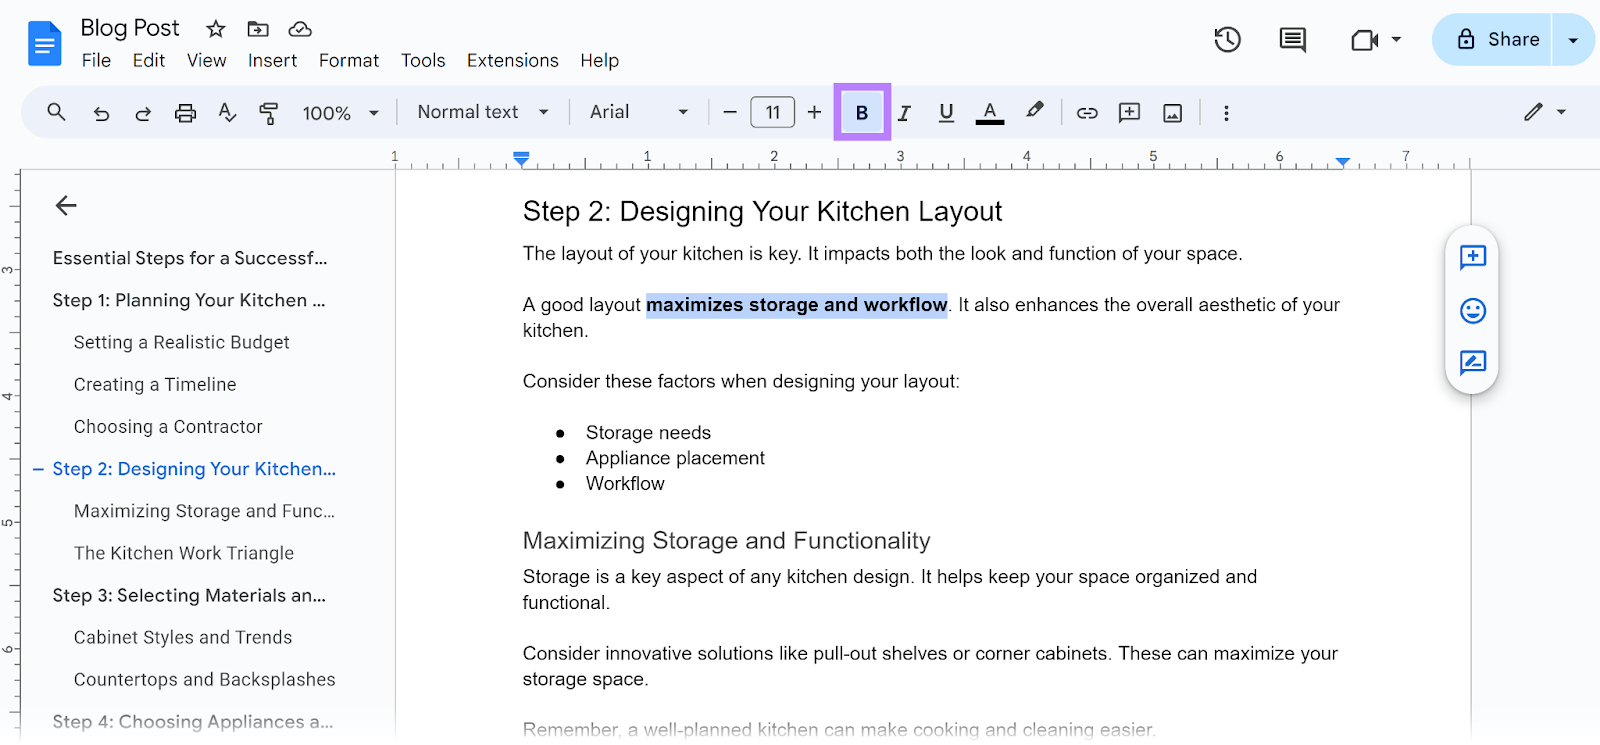
To bold your text, highlight it in your writing app or CMS. Then, click the bold icon:
And don’t use underlines for emphasis. Because readers may mistake underlined text for links.
4. Create Lists
Lists are a series of points presented one after another. They help you:
- Display multiple related points concisely
- Present information in a sequential order
- Add visual variety to your post
List points have a symbol—known as a prefix character—in front of them to mark the start of each point.
For example, the prefix character for the list above is a black circle (also known as a bullet).
There are two types of lists:
Ordered Lists
Ordered lists display points in a specific order.
Their prefix characters are typically numbers or letters. And they display their points in ascending order (like from one to 10) to tell readers the order in which they should read them.
For example, if you’re sharing instructions, presenting them as an ordered list helps readers understand the sequence.
Just like this numbered list of steps in Mnmlscholar’s blog post:
Presenting information in ordered lists also helps readers keep track of their progress through the discussion.
For instance, this very blog post provides seven formatting tips. We’re currently at the fourth tip. So, we’re just over halfway through.
To create an ordered list, click the ordered list icon in your writing app or CMS. It looks like a numbered list:
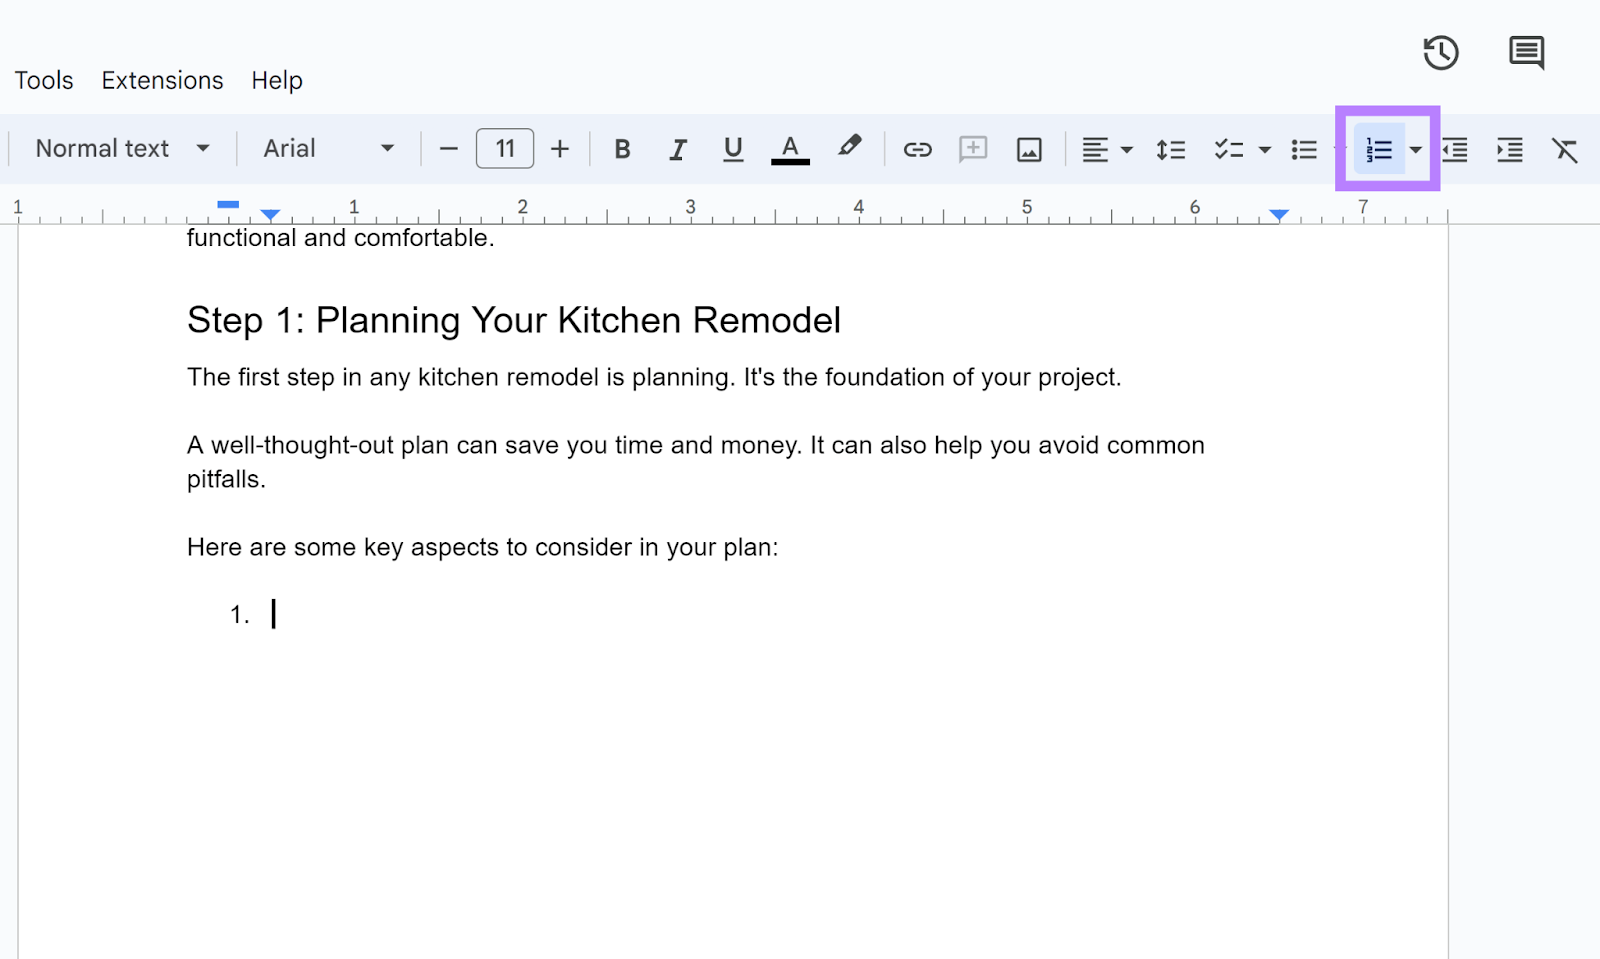
A first numbered list point will appear. Type your text, and then hit “Enter” or “return” on your keyboard to add more points.
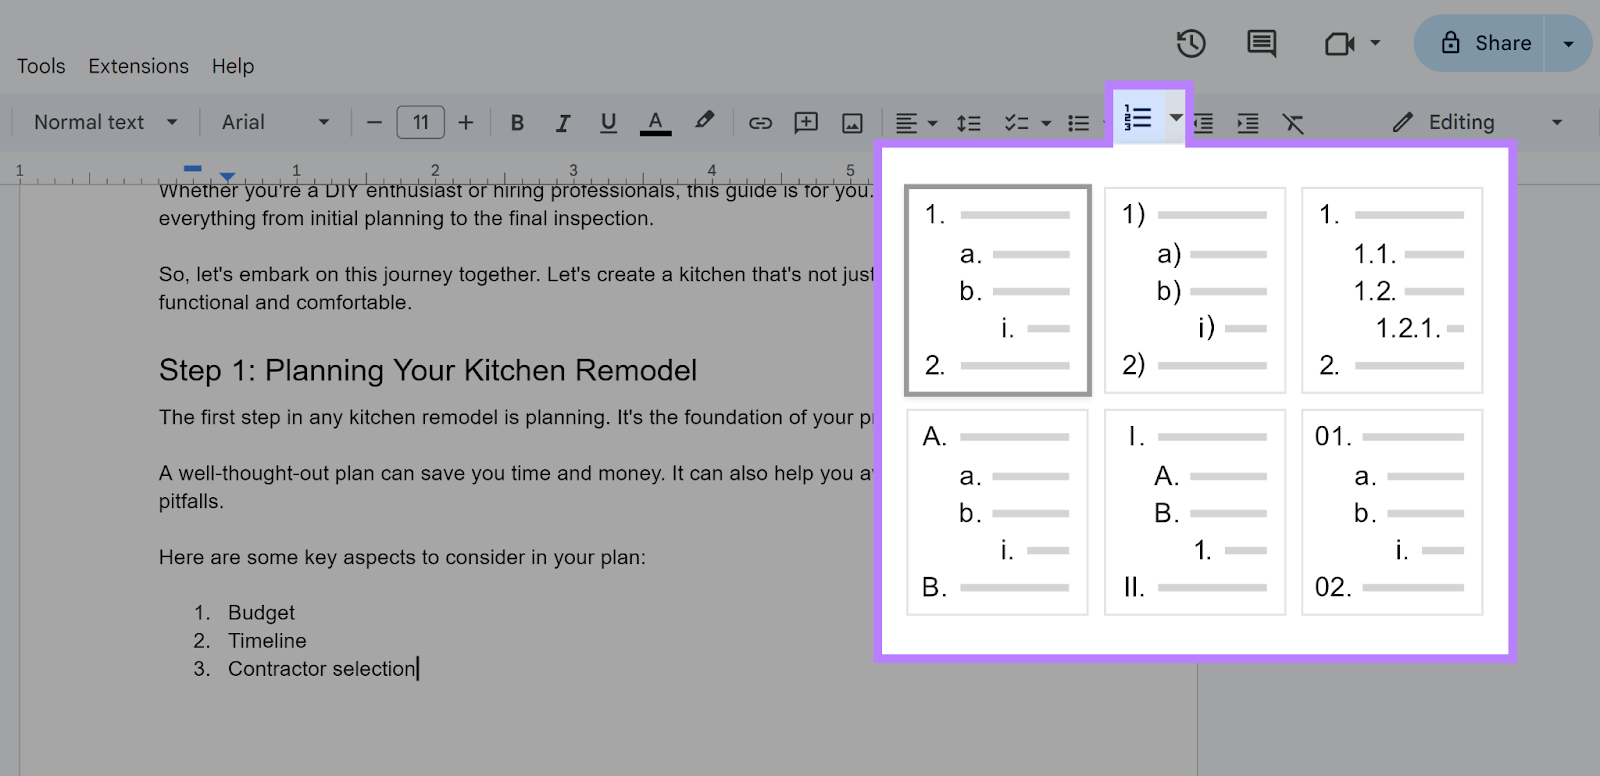
Your writing app or CMS should also let you change your ordered list’s prefix character from numbers to letters (or vice versa).
Unordered Lists
Unordered lists display points in no particular sequence. Their points also share the same prefix character, like a bullet or dash.
This list on The Manual’s blog post is unordered:
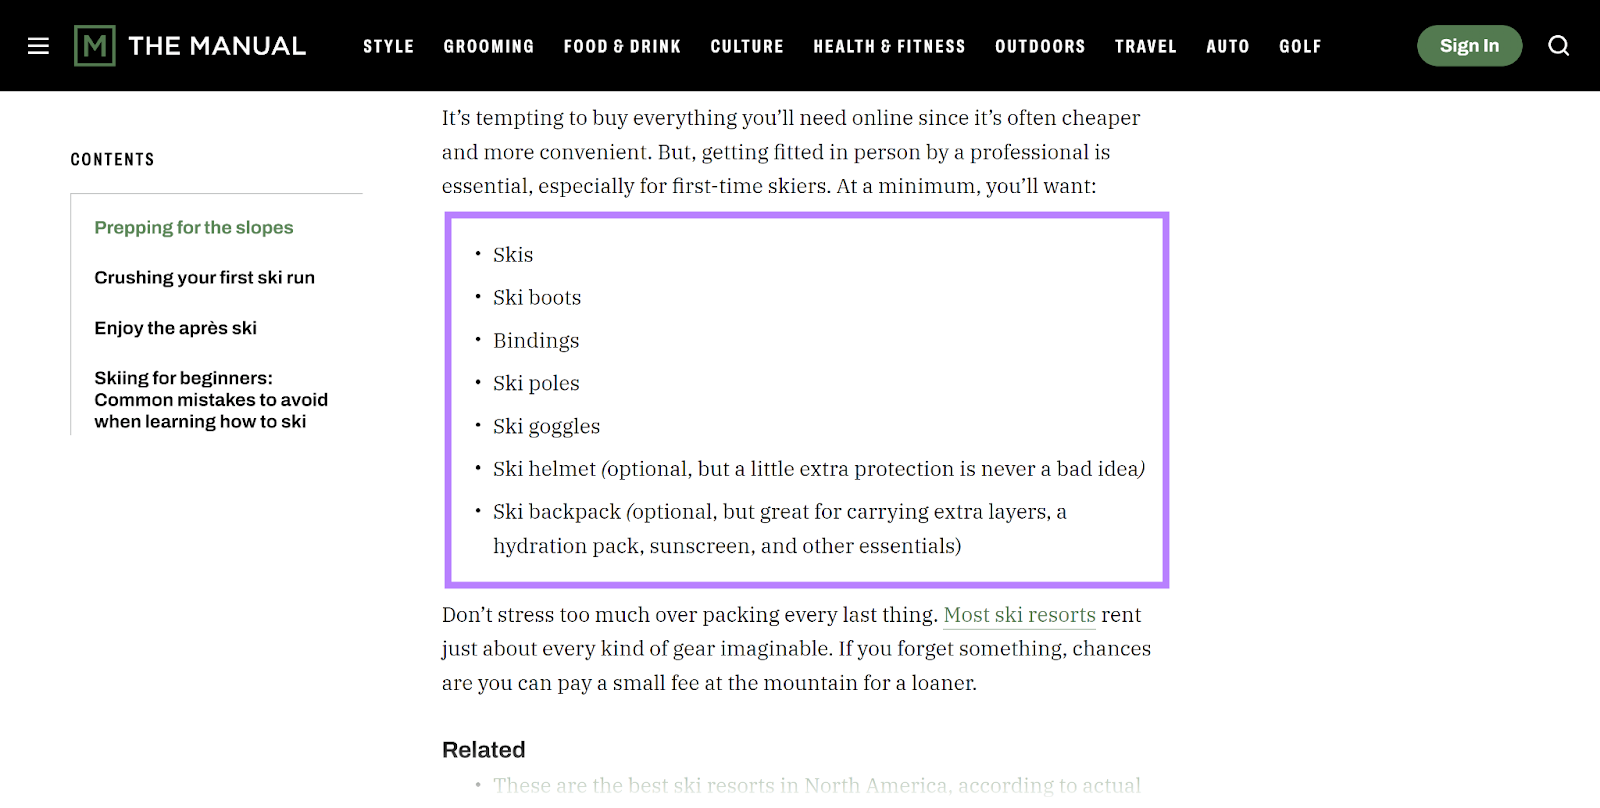
Present your points in an unordered list if each point has equal importance. And the order in which people read them doesn’t matter.
To create an unordered list, click the unordered list icon in your writing app or CMS. It looks like a list with bullet points:
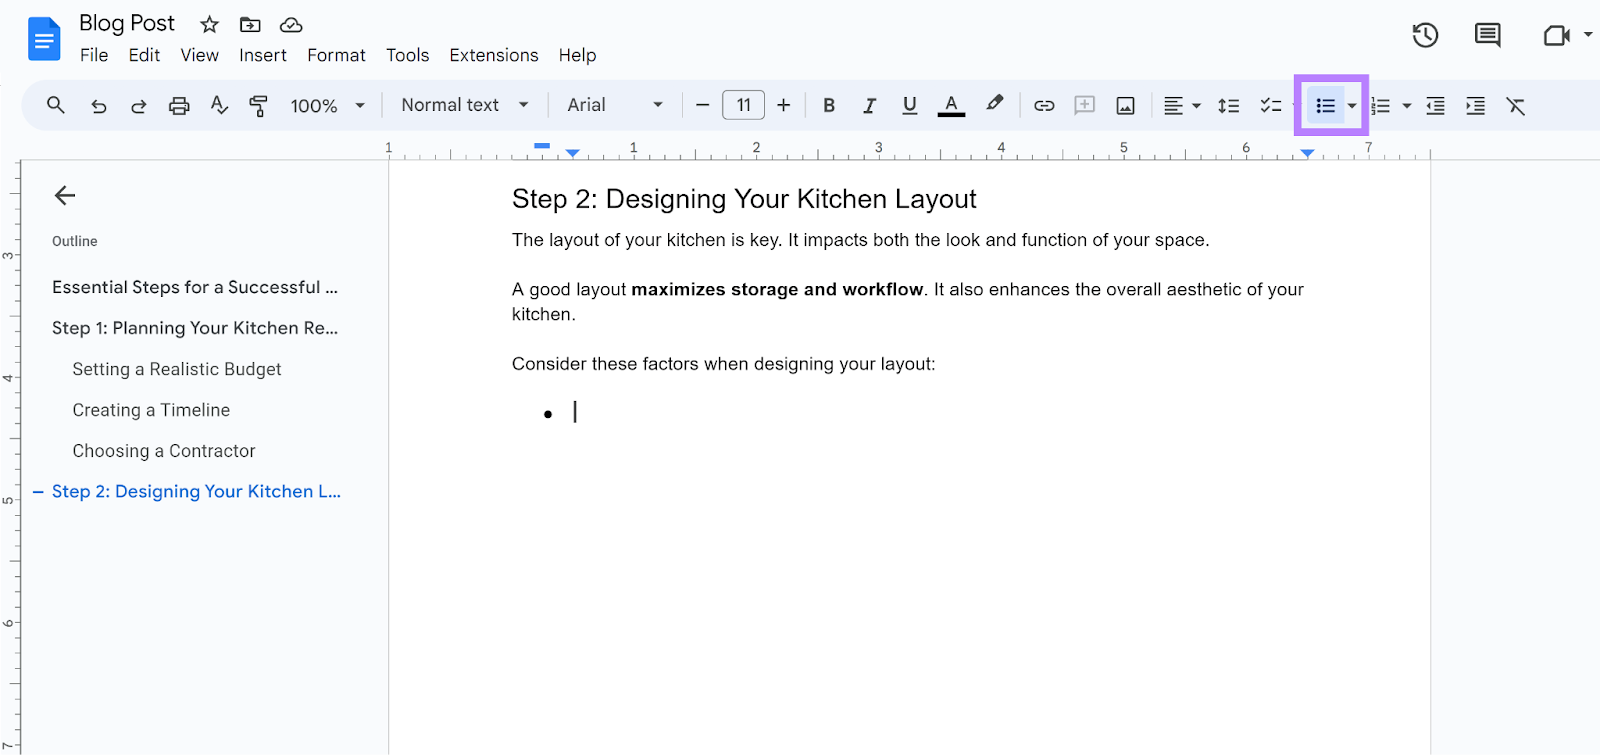
An unordered list point will appear. Type your text, and then add more points by pressing “Enter” or “return” on your keyboard.
5. Insert Visuals
Visuals depict concepts in a graphical format. And can help make complex ideas easier to understand.
Visuals also add color and visual variety. Making your content more appealing.
Some examples of visuals are:
Images and Videos
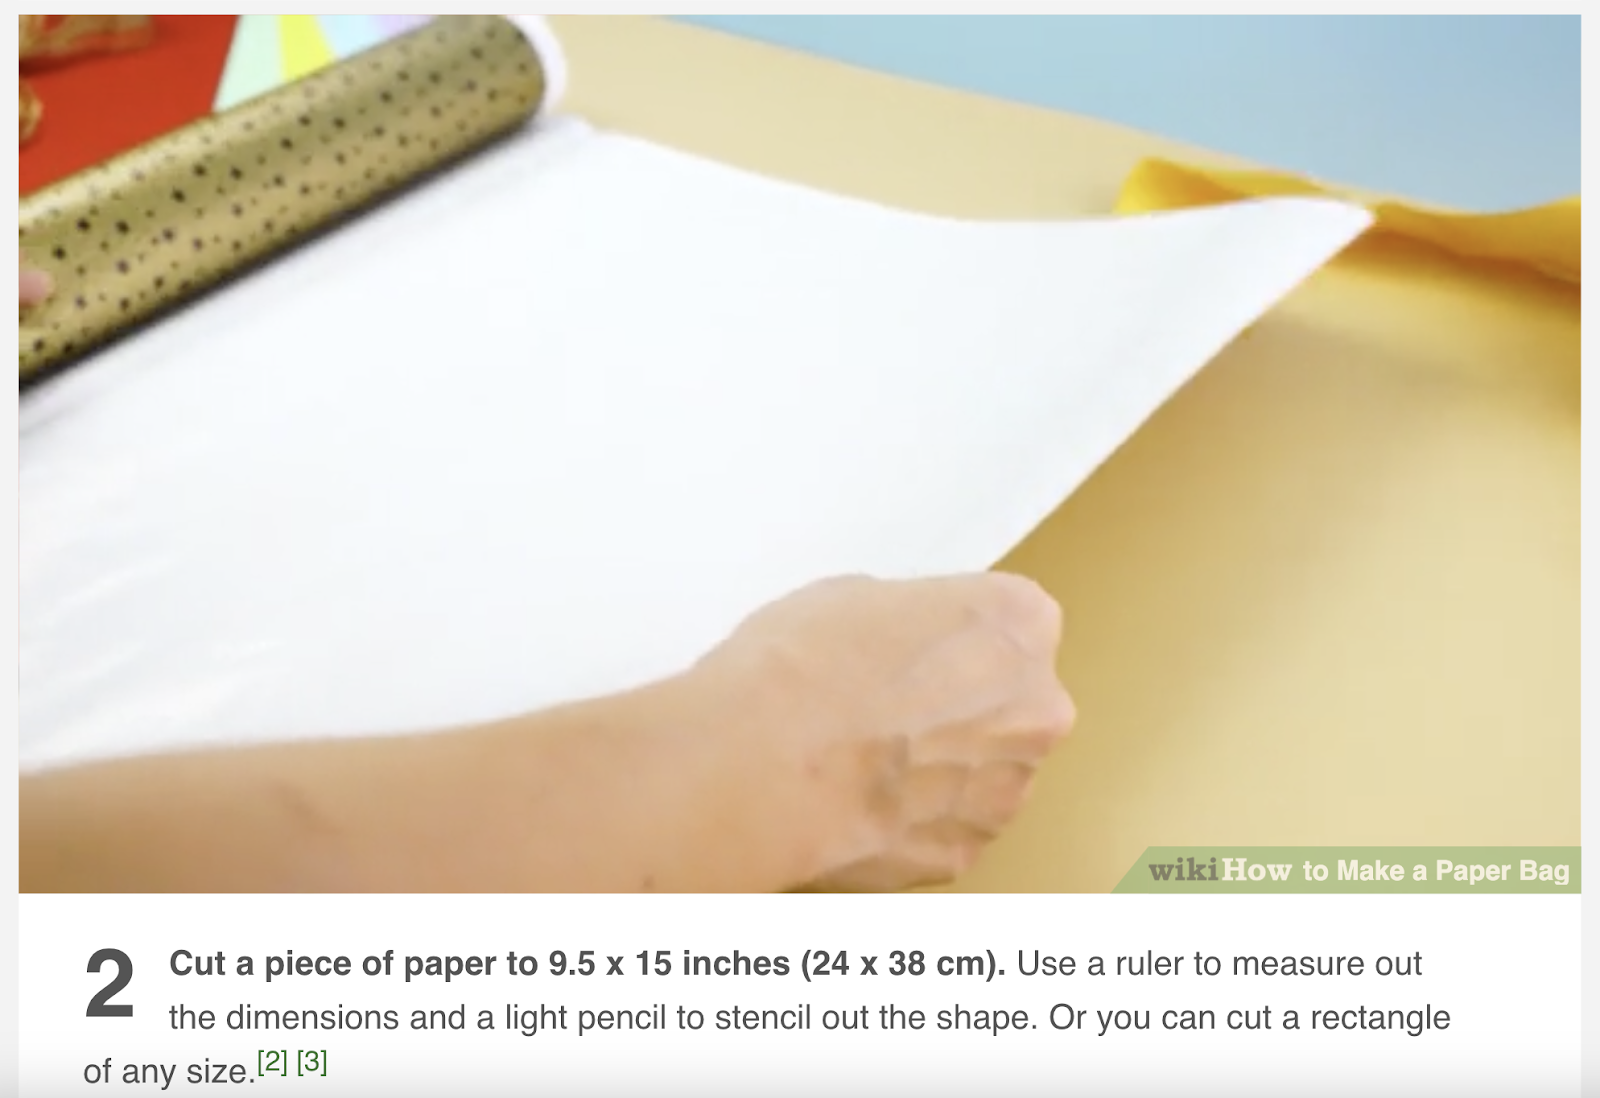
WikiHow uses text alongside static and animated images to explain the process of making a paper bag.
If readers find the text instructions confusing, they can follow the image demonstrations instead.
Data Visualizations
Data visualizations are diagrams that represent data in visual form. Like tables, charts, and graphs.
These diagrams help users understand the data. And its implications.
For example, this chart summarizes some findings from our State of Search 2023 report:
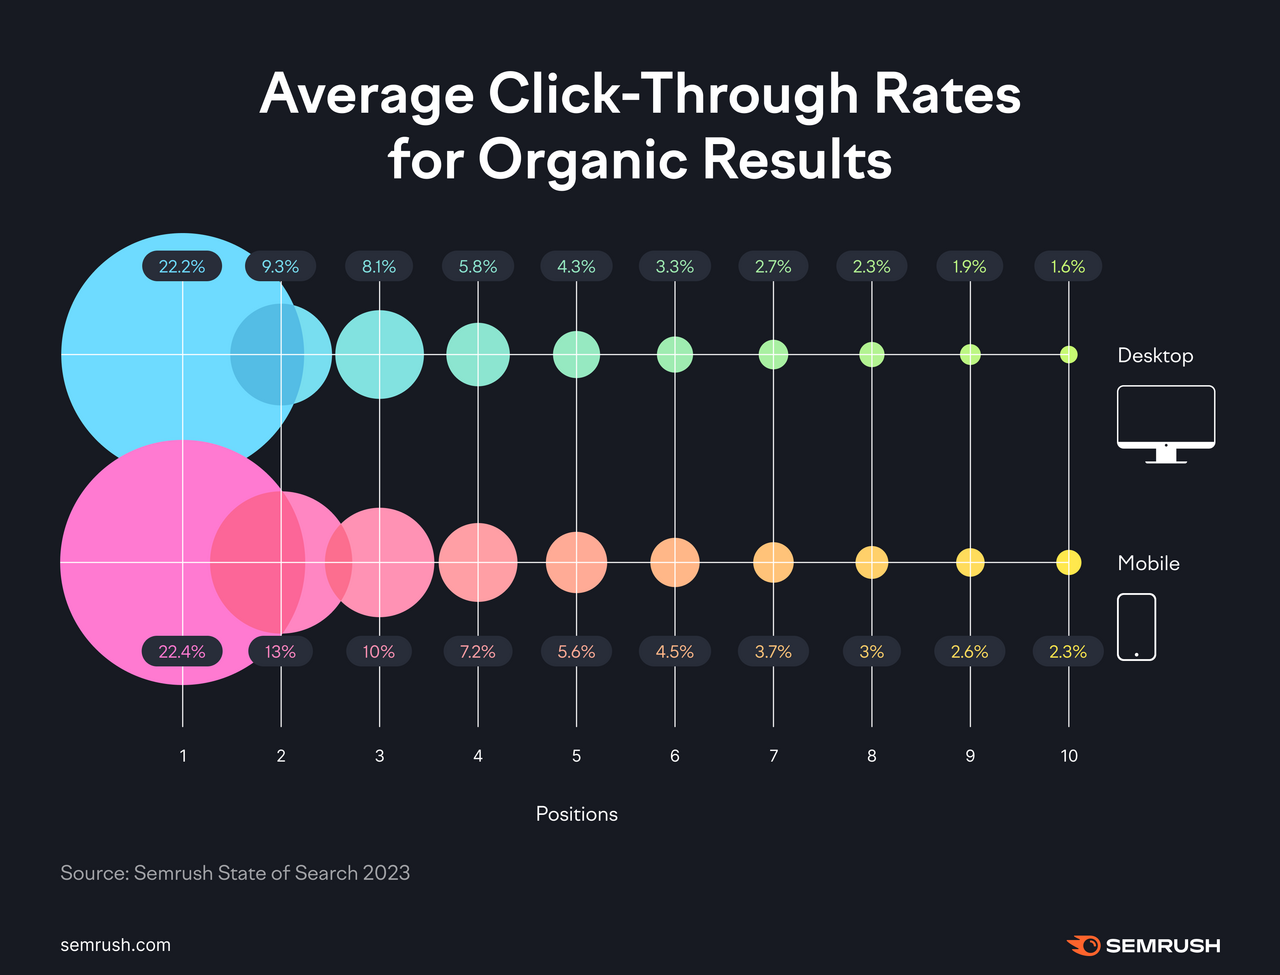
This format makes it far easier for readers to digest lots of information. And compare the different figures.
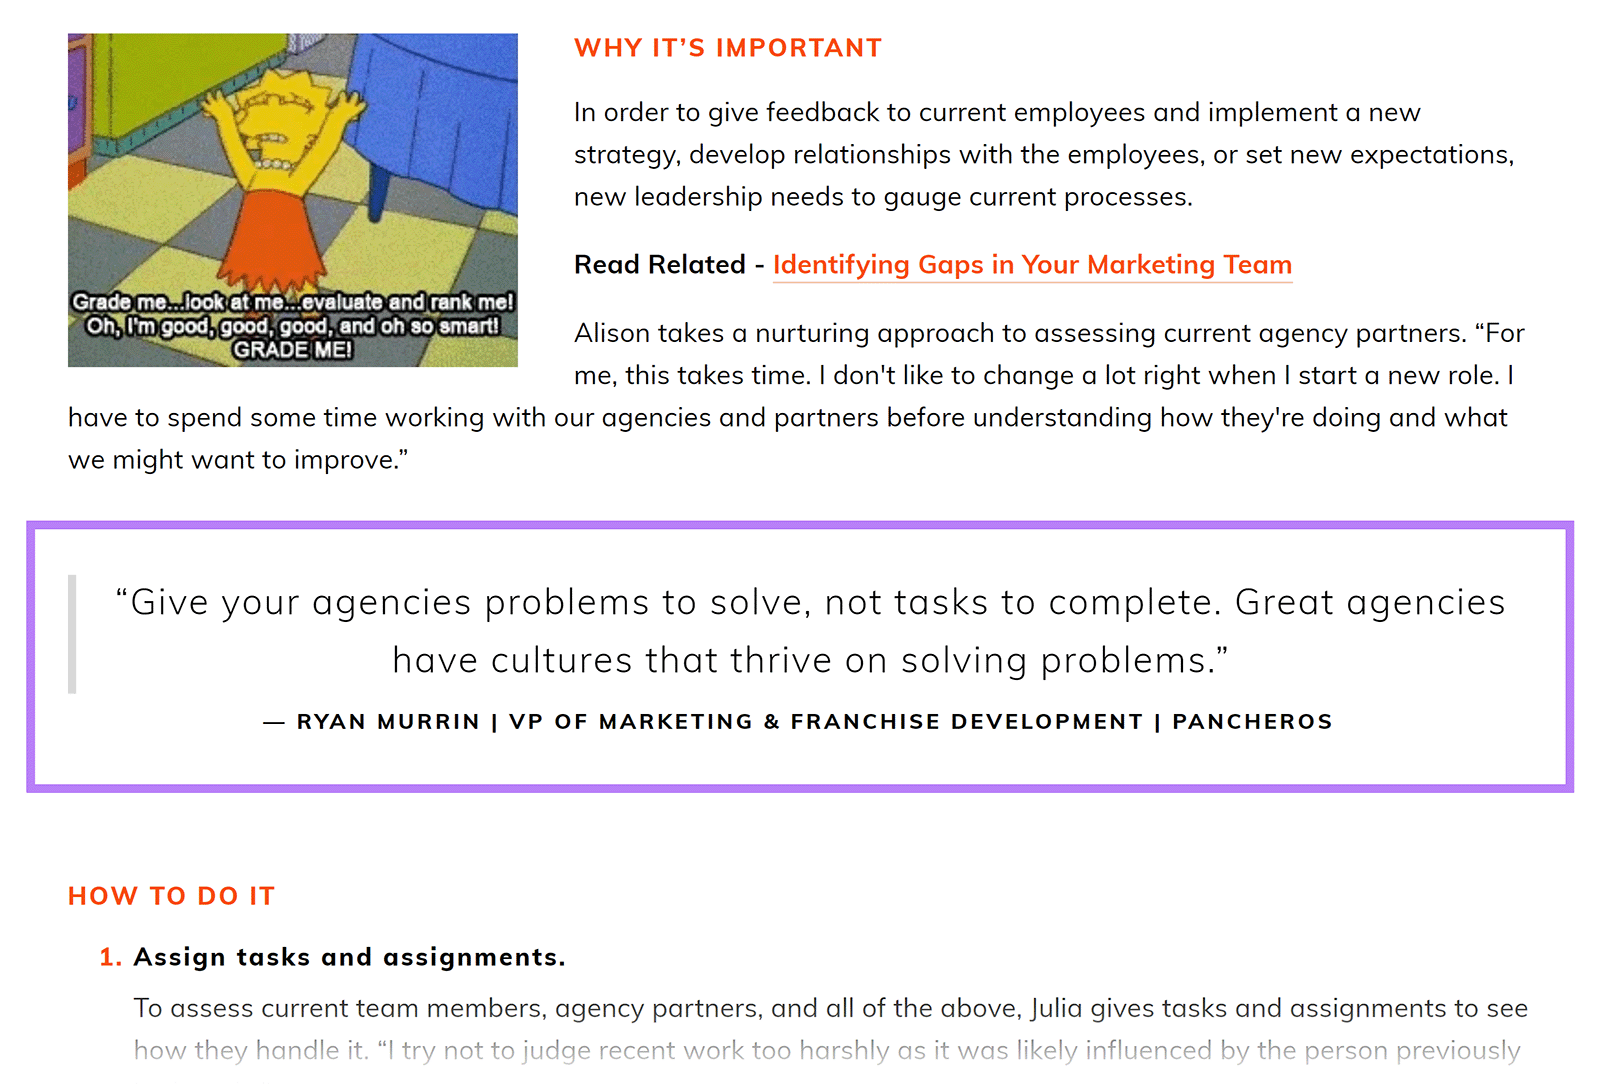
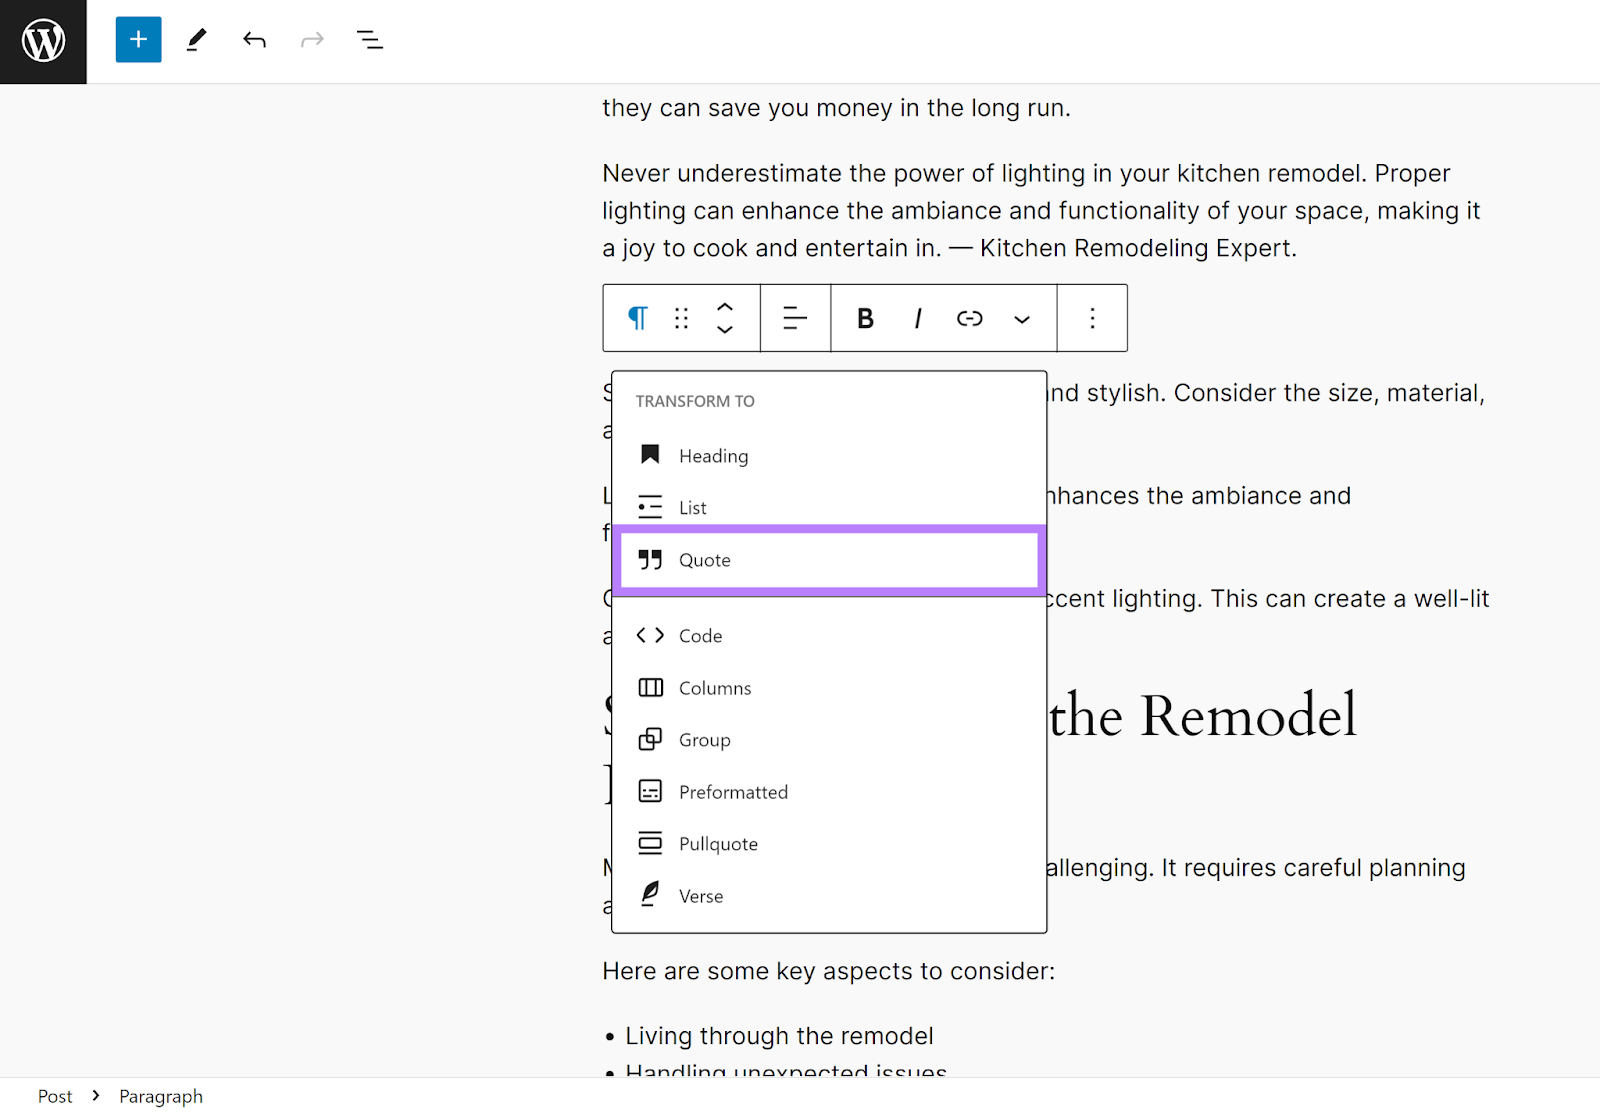
6. Add Block Quotes
Block quotes are portions of text formatted as quotes on the page. They tend to have a special design, which adds visual interest.
Consider using block quote formatting if you’re adding expert quotes to your blog post.
Just like this Setup blog post has done:
Many CMSs can help with block quote formatting.
If you’re formatting your post in WordPress’s editor, highlight the text you want to turn into a block quote. Then, click the paragraph icon (¶) in the block toolbar and select “Quote.”
7. Use Call-to-Action Buttons and Banners
Format your CTAs as buttons and banners. These grab more attention than plain CTA text.
For example, here’s a banner from our content marketing strategy guide:
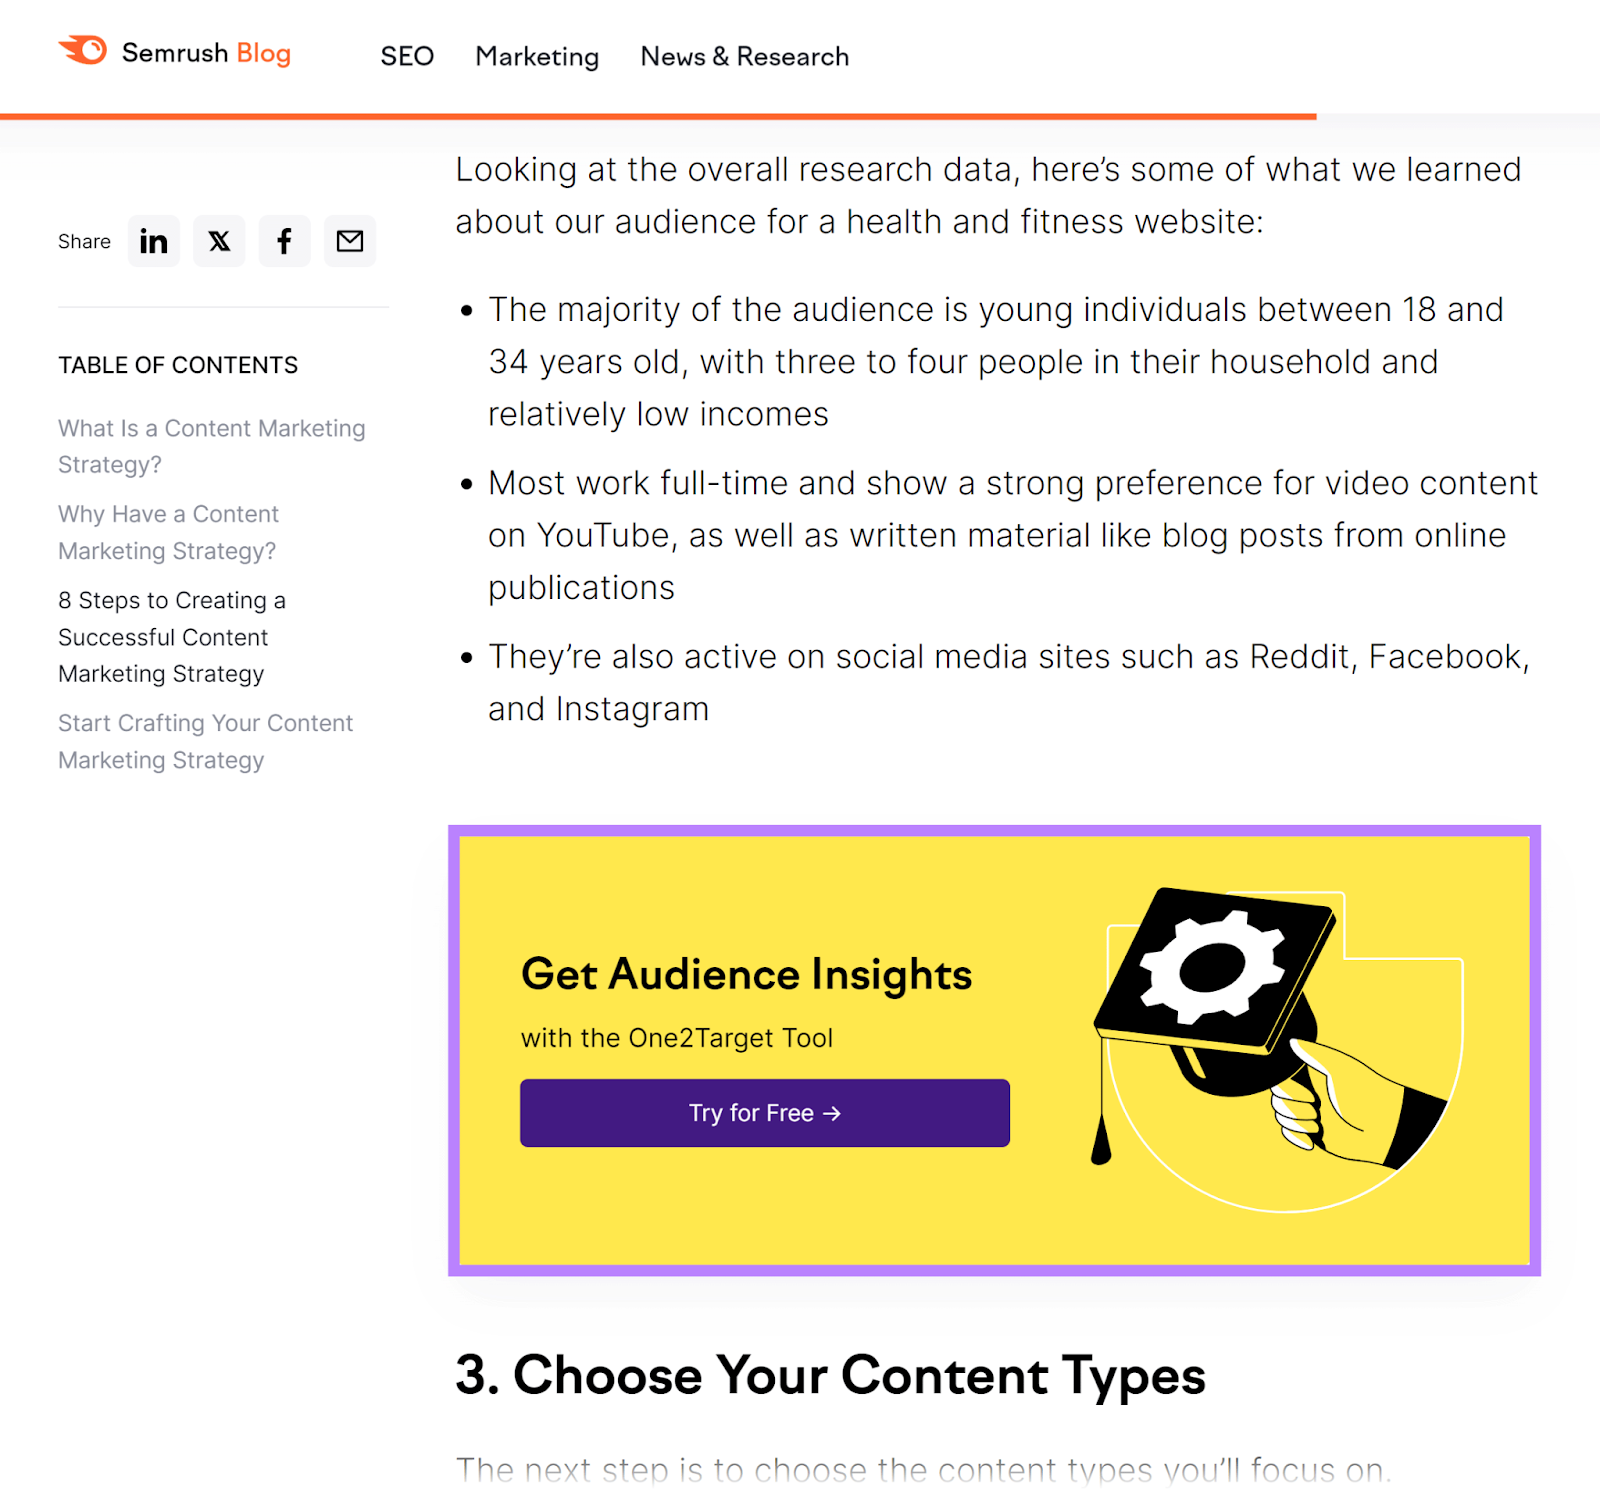
We could have simply typed our CTA out in plain text. But it wouldn’t have been as obvious. Or as compelling to click.
Your CMS may have a built-in feature for creating buttons.
To add buttons to a WordPress post, open the post in the editor. Type “/” on your keyboard to display the block toolbar, and then select “Buttons.”
Doing this will add a button to your post.
Fill it out with your CTA text. Next, click the text and then click the link icon to provide your CTA’s URL.

Finally, use the right sidebar settings to customize your button’s design.
To add a banner, create it as an image in a graphic design app like Canva. Then, embed the banner into your post and link it to your CTA’s destination page.
Examples of Common Blog Post Types for Inspiration
Here, we’ll analyze the formatting of some common blog post types.
Listicle Posts
Listicles are articles with the main content in list form. Listicle writers tend to format each list item as an H2 heading.
They may also number each heading. To help users monitor their progress through the list.
Just like this 10-tip listicle for saving water by WWF:
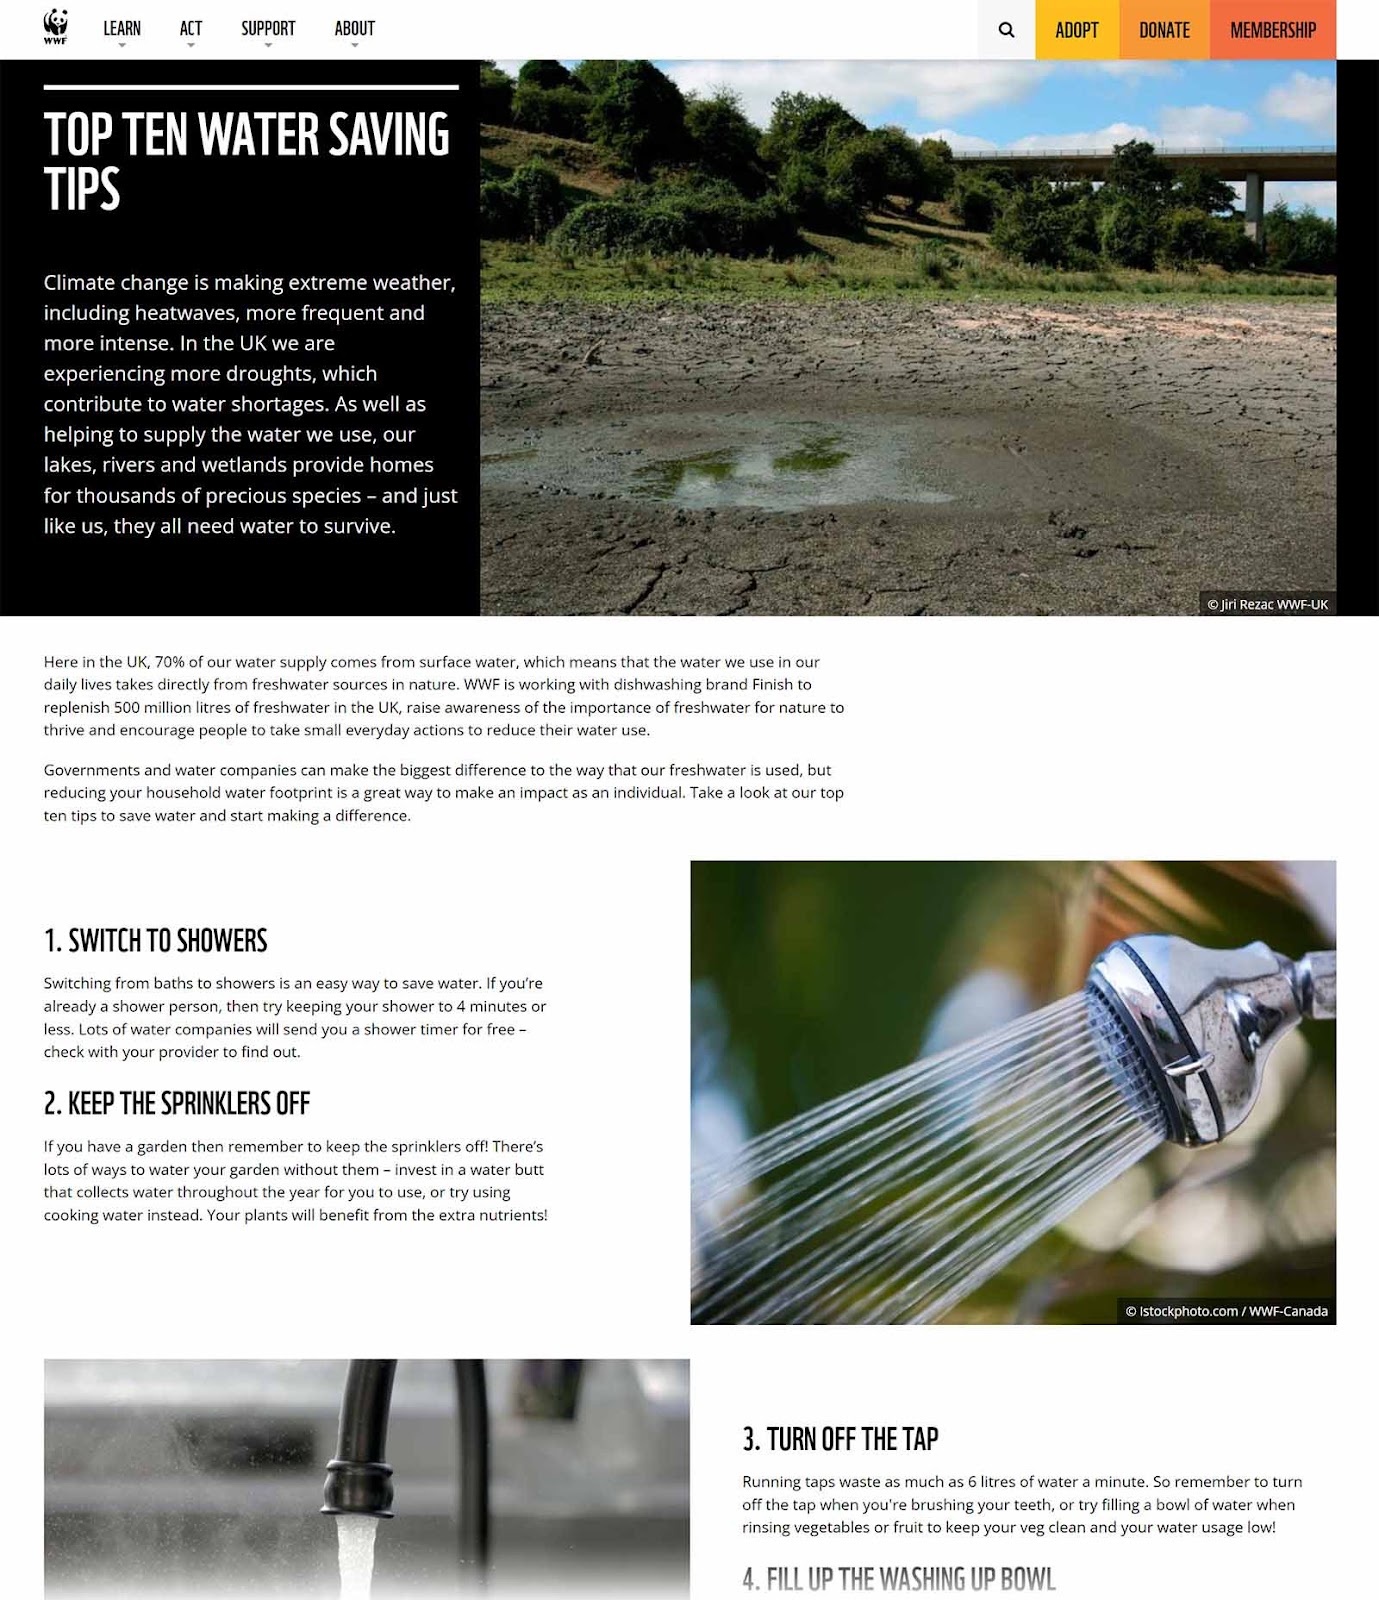
Check out our blog post templates for a listicle blog post format template (and more).
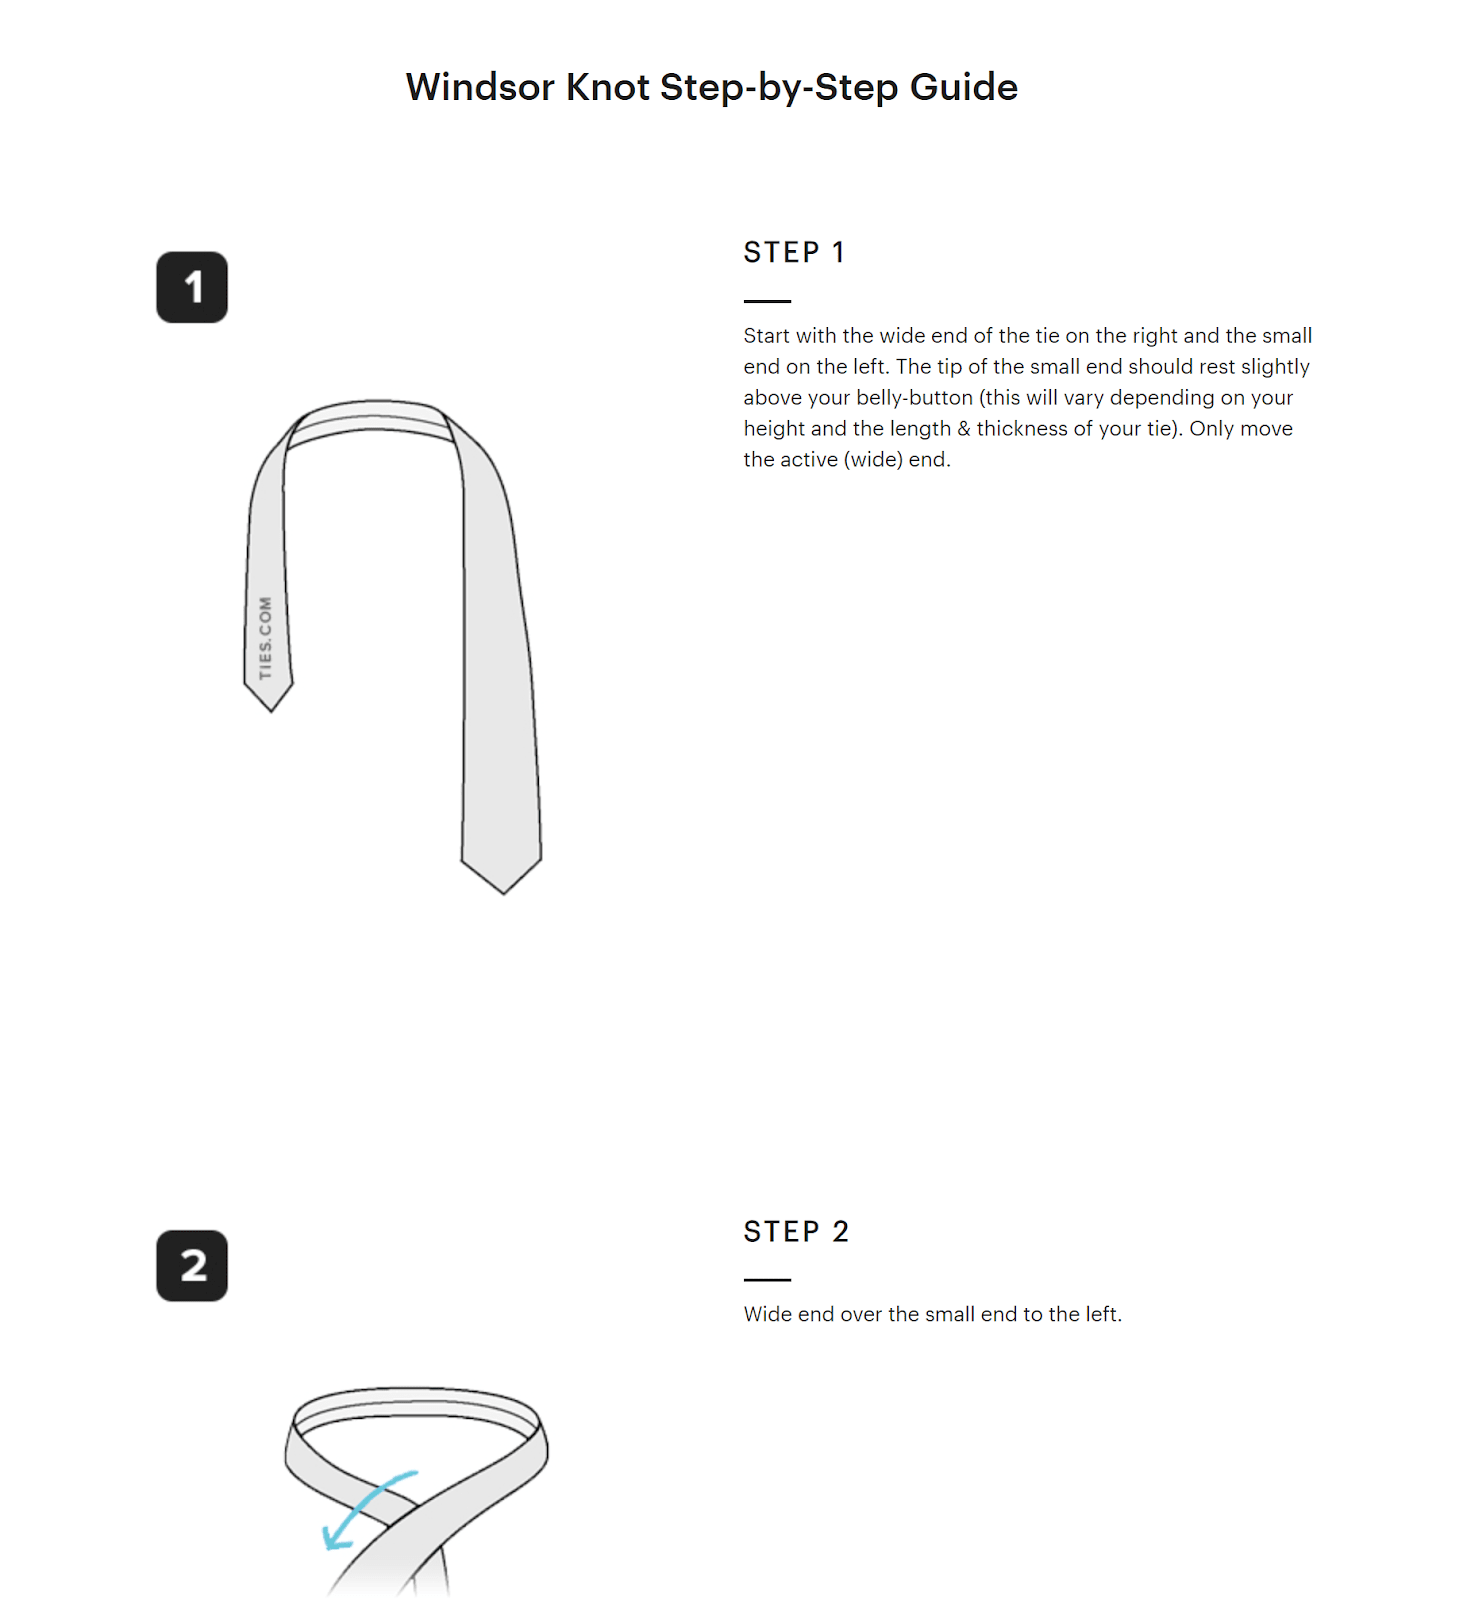
How-To Articles
How-to articles provide information on how to do something. Writers usually present the instructions as numbered headings or lists. So readers know the order in which they should follow them.
The article may also include supporting visuals to clarify the steps.
Ties.com’s article on tying the Windsor knot is a good example. It starts with a video that walks users through the process:
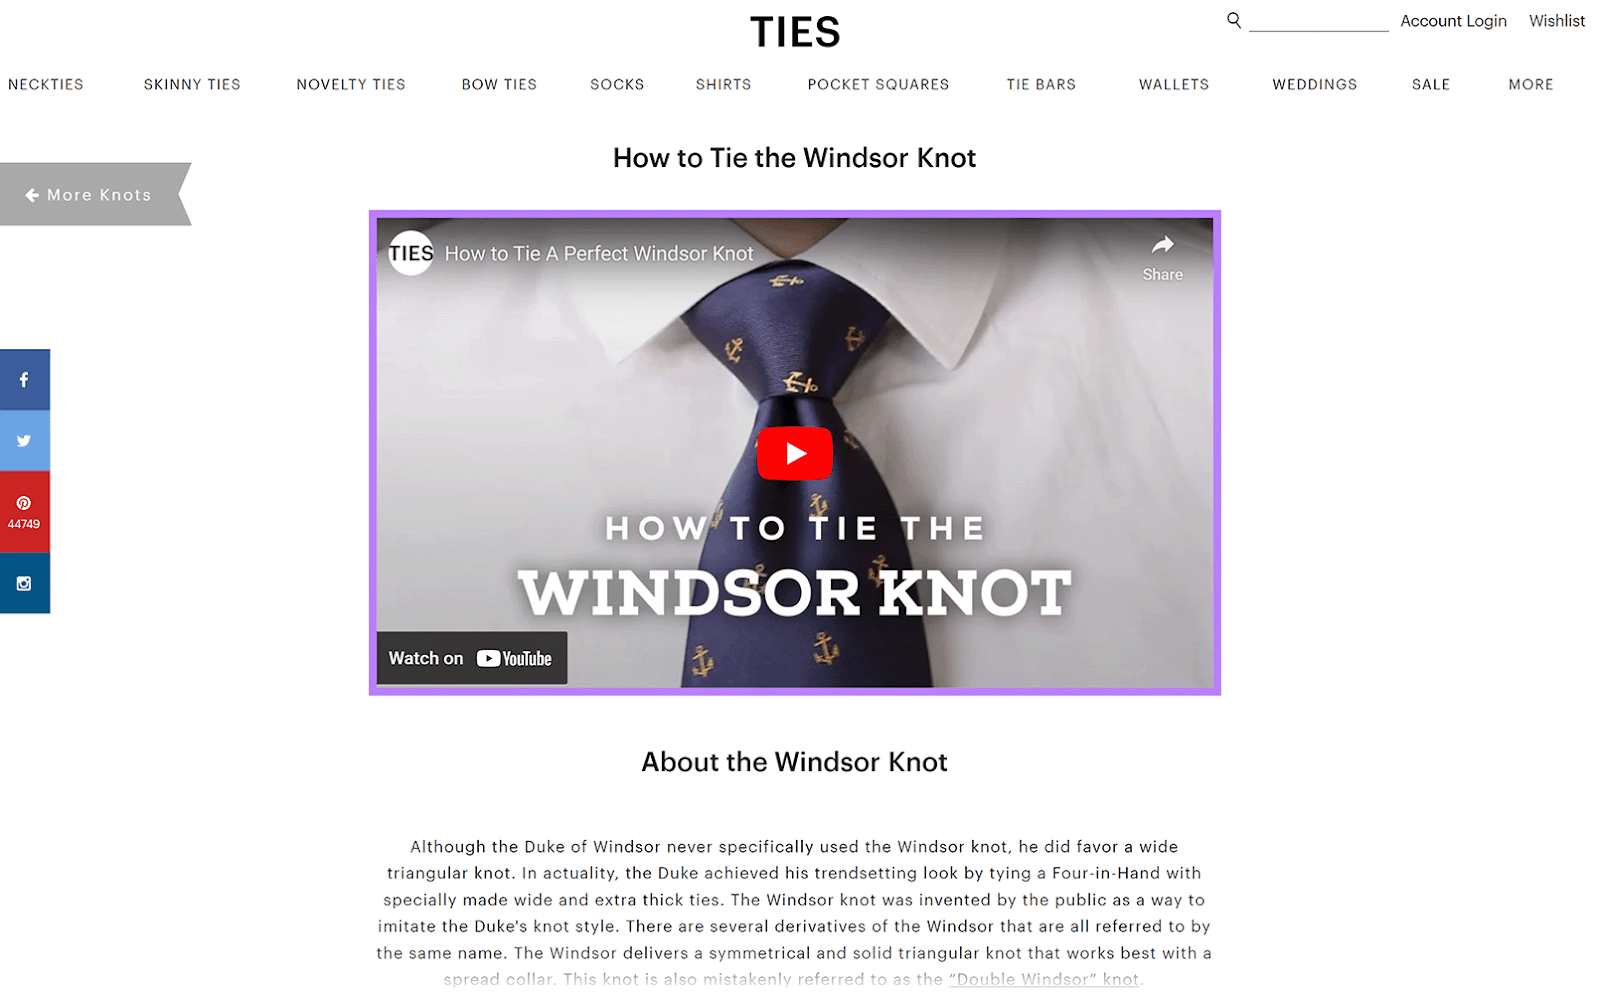
It then provides a list of step-by-step instructions. With images to illustrate.
Grab a how-to article template from our collection of blog post templates.
Review Articles
Review articles assess the qualities of a product or service.
To help readers follow the discussion, they may use formatting elements like:
- Headings for each review criterion
- Lists of the product or service’s features, pros, and cons
- Images and videos showing the product or service in action
- CTA buttons and banners that readers can click to buy the product or sign up for the service
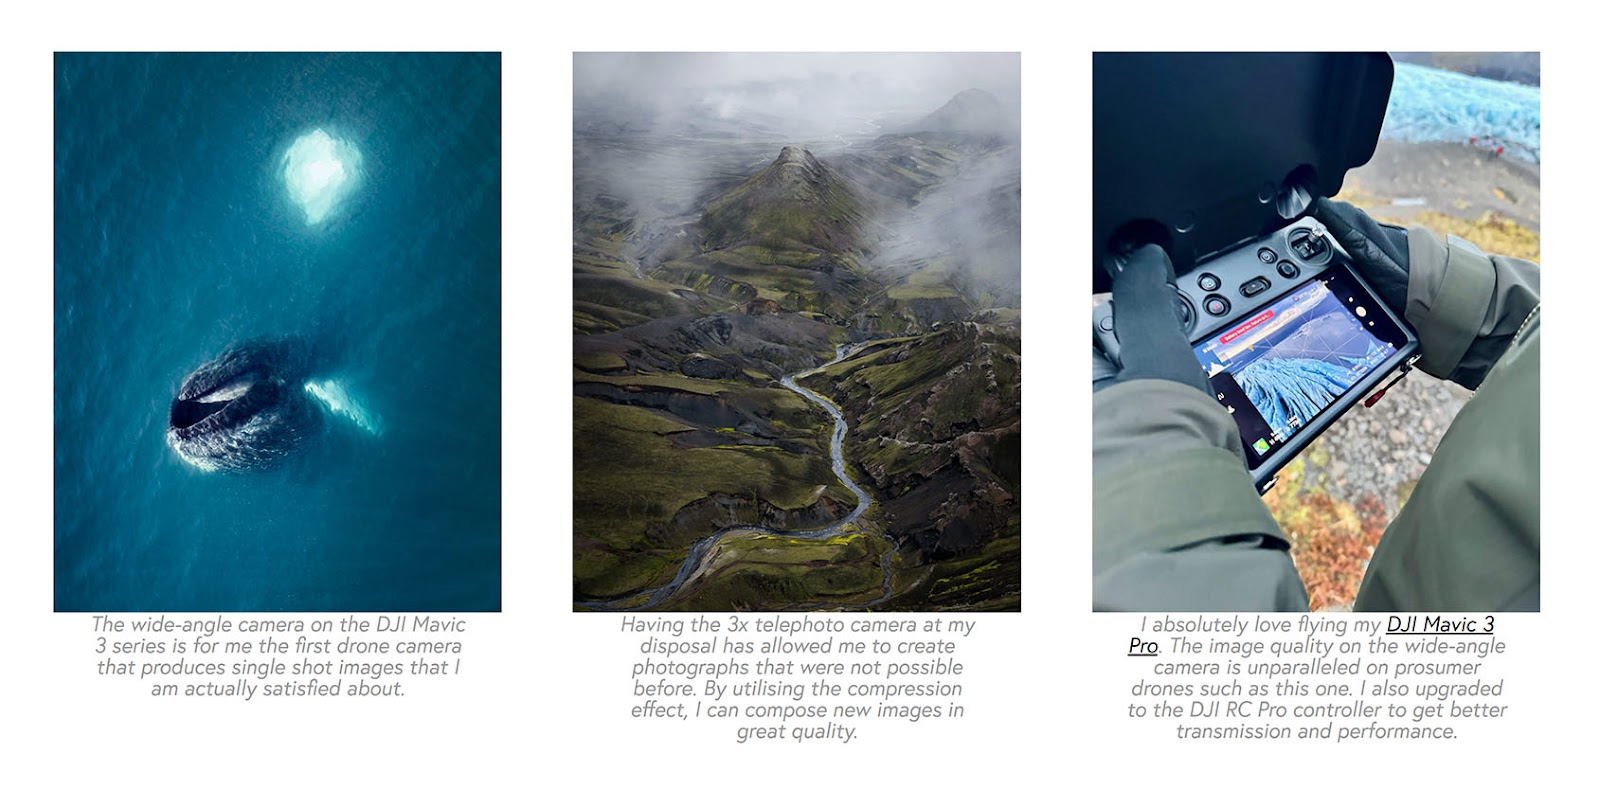
For example, Jeroen Van Nieuwenhove’s review article on the DJI Mavic 3 Pro drone features some photos he captured using the drone. And photos of the drone itself.
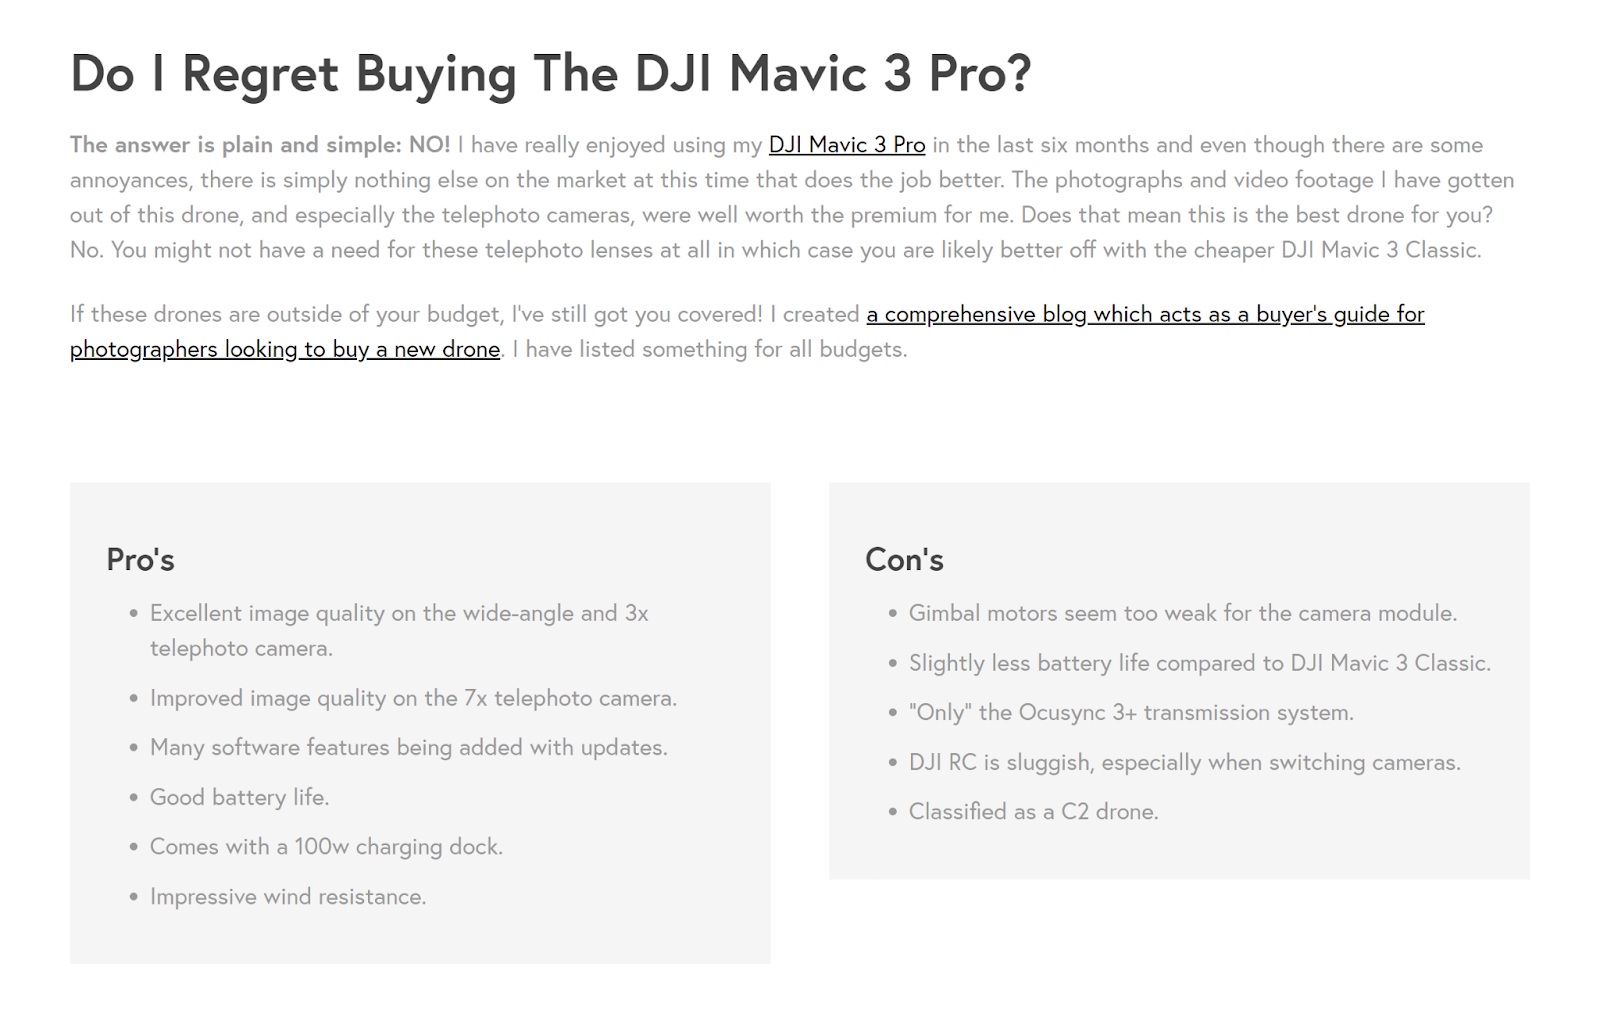
The article also concisely covers the drone’s pros and cons as unordered lists.
Plus, these lists are in side-by-side colored boxes. Which makes them stand out.
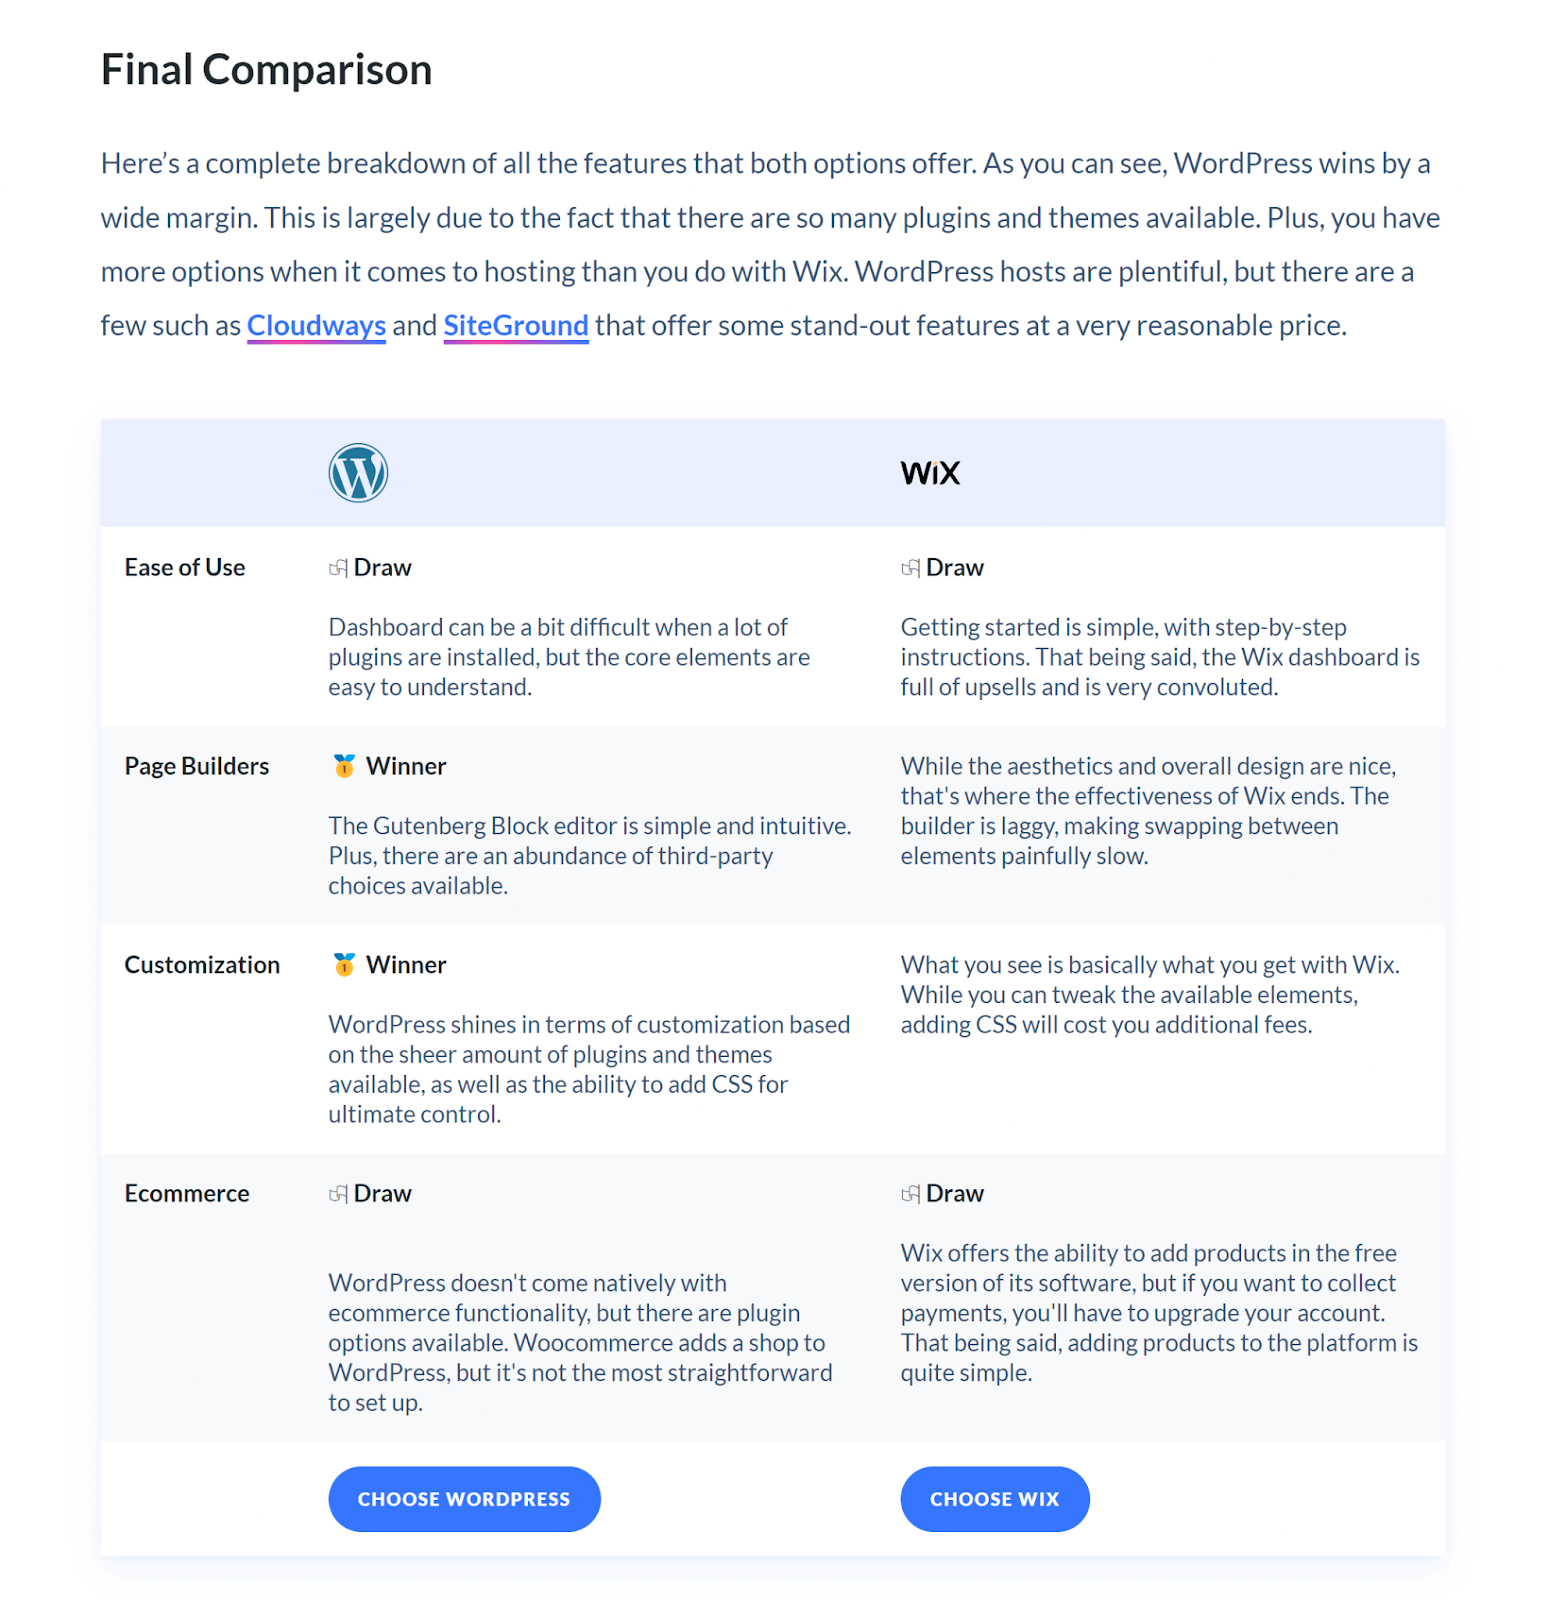
Comparison Posts
Comparison posts evaluate two or more products or services against each other.
They commonly include data visualizations. To help readers compare features at a glance.
For example, Versus uses a radar chart to show how two earphone models compare on key criteria:

And this table on Elegant Themes’s post makes it easy to compare the Wix website platform against WordPress:
Expert Guides
Expert guides are in-depth informational pieces on a subject. Their typical formatting elements include:
- Headings for each topic
- A table of contents showing the guide’s topics
- Visuals to illustrate concepts
- Lists of bite-sized information
- Block quotes for expert opinions and/or soundbites
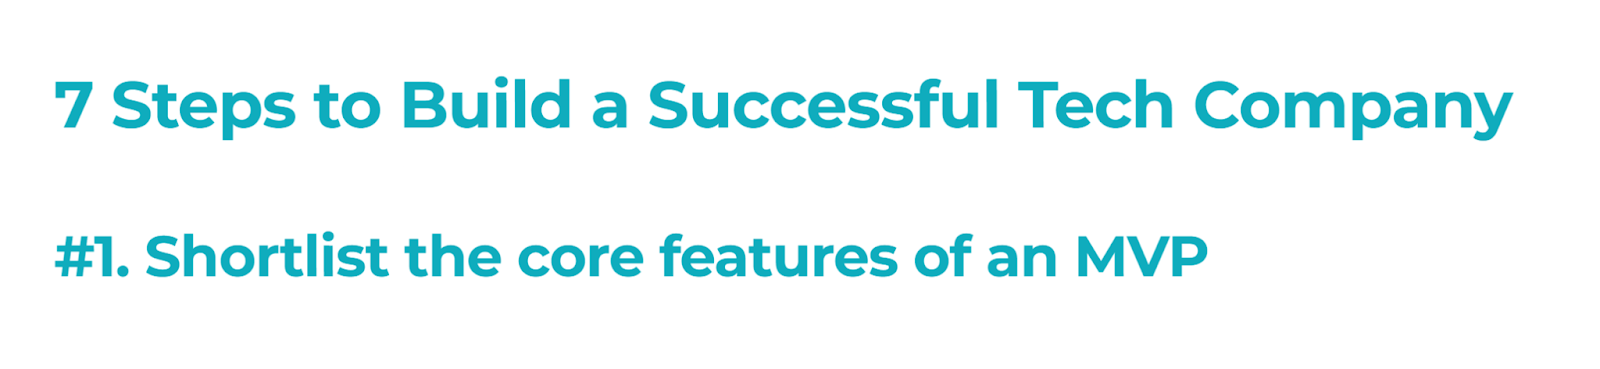
For instance, MassChallenge’s seven-step guide to starting a tech company presents each step as a numbered heading:
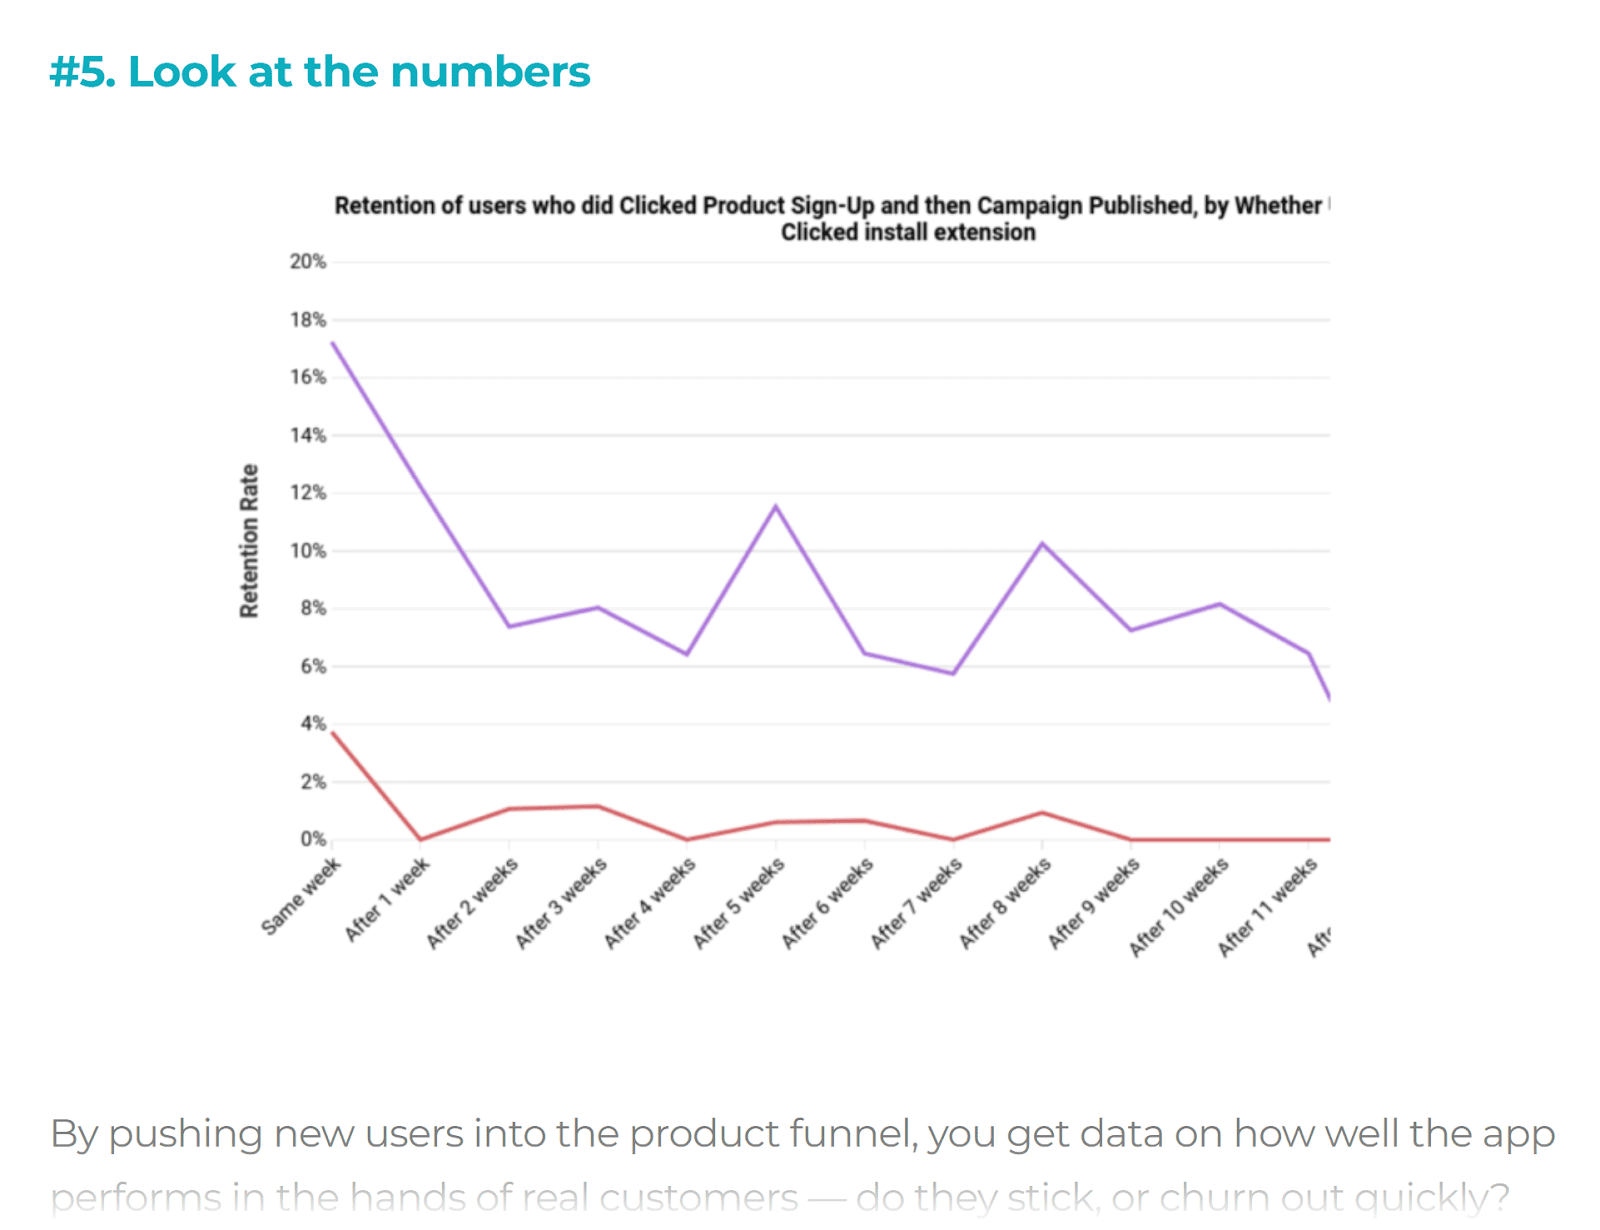
It includes charts for visualizing data:
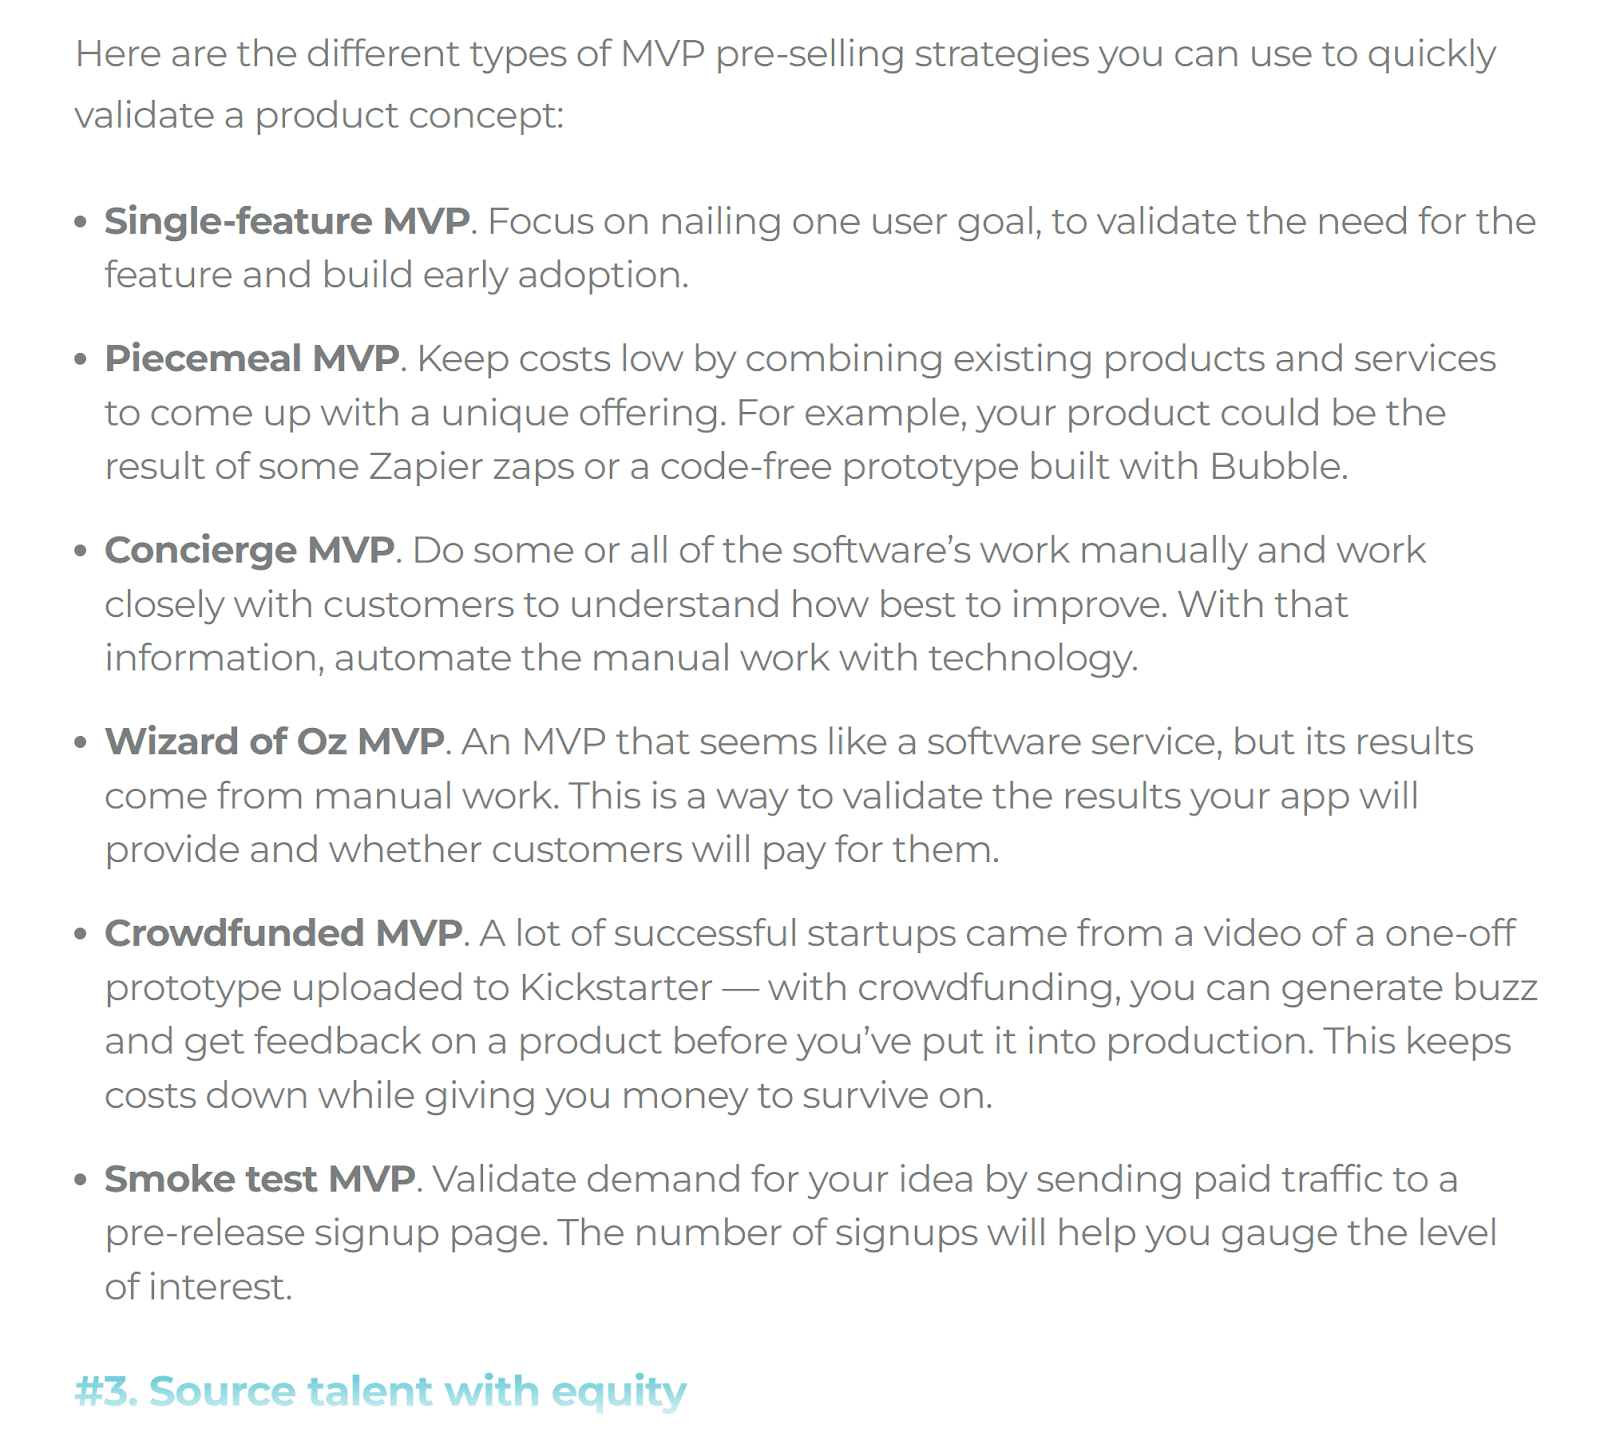
And the guide displays certain information as succinct lists:
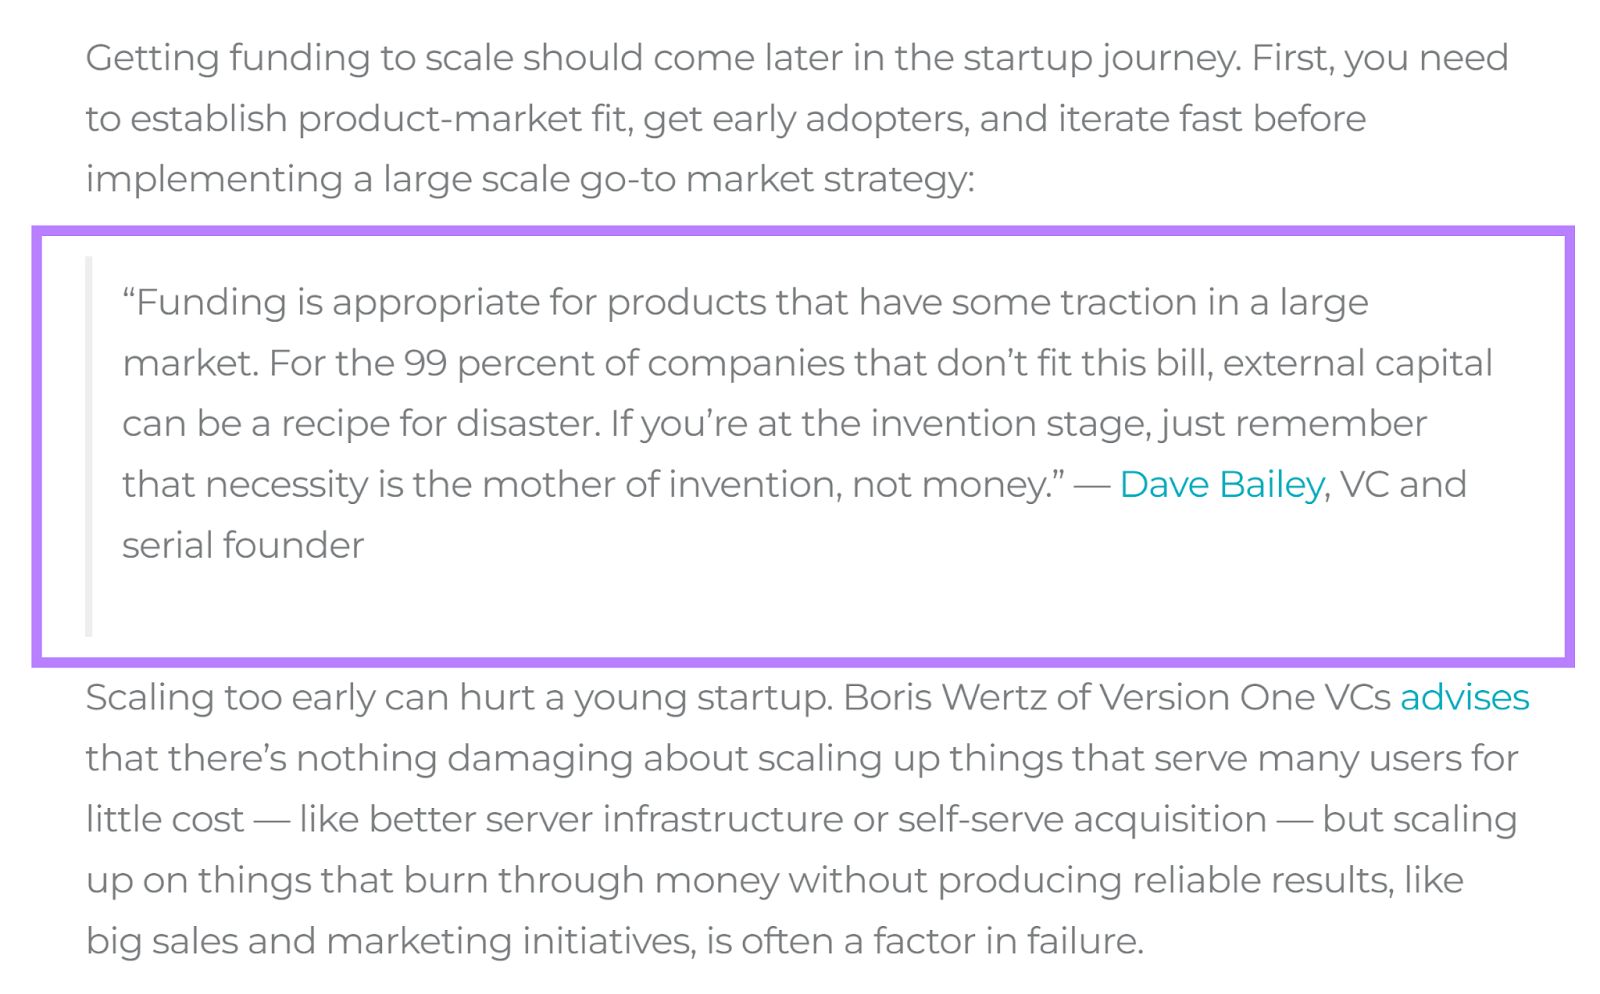
It also prominently features quotes from tech leaders in block quotes.
Further reading: Blog Post Examples and Best Practices to Inspire Your Writing
Take Action by Refining Your Existing Blog Posts
Before writing new blog posts, improve existing ones first.
This generally takes less time. So you can get more conversions quicker.
You can identify high-priority blog posts with the On Page SEO Checker.
After setting up your project in the tool, scroll down the “Overview” tab to see a list of top pages to optimize.
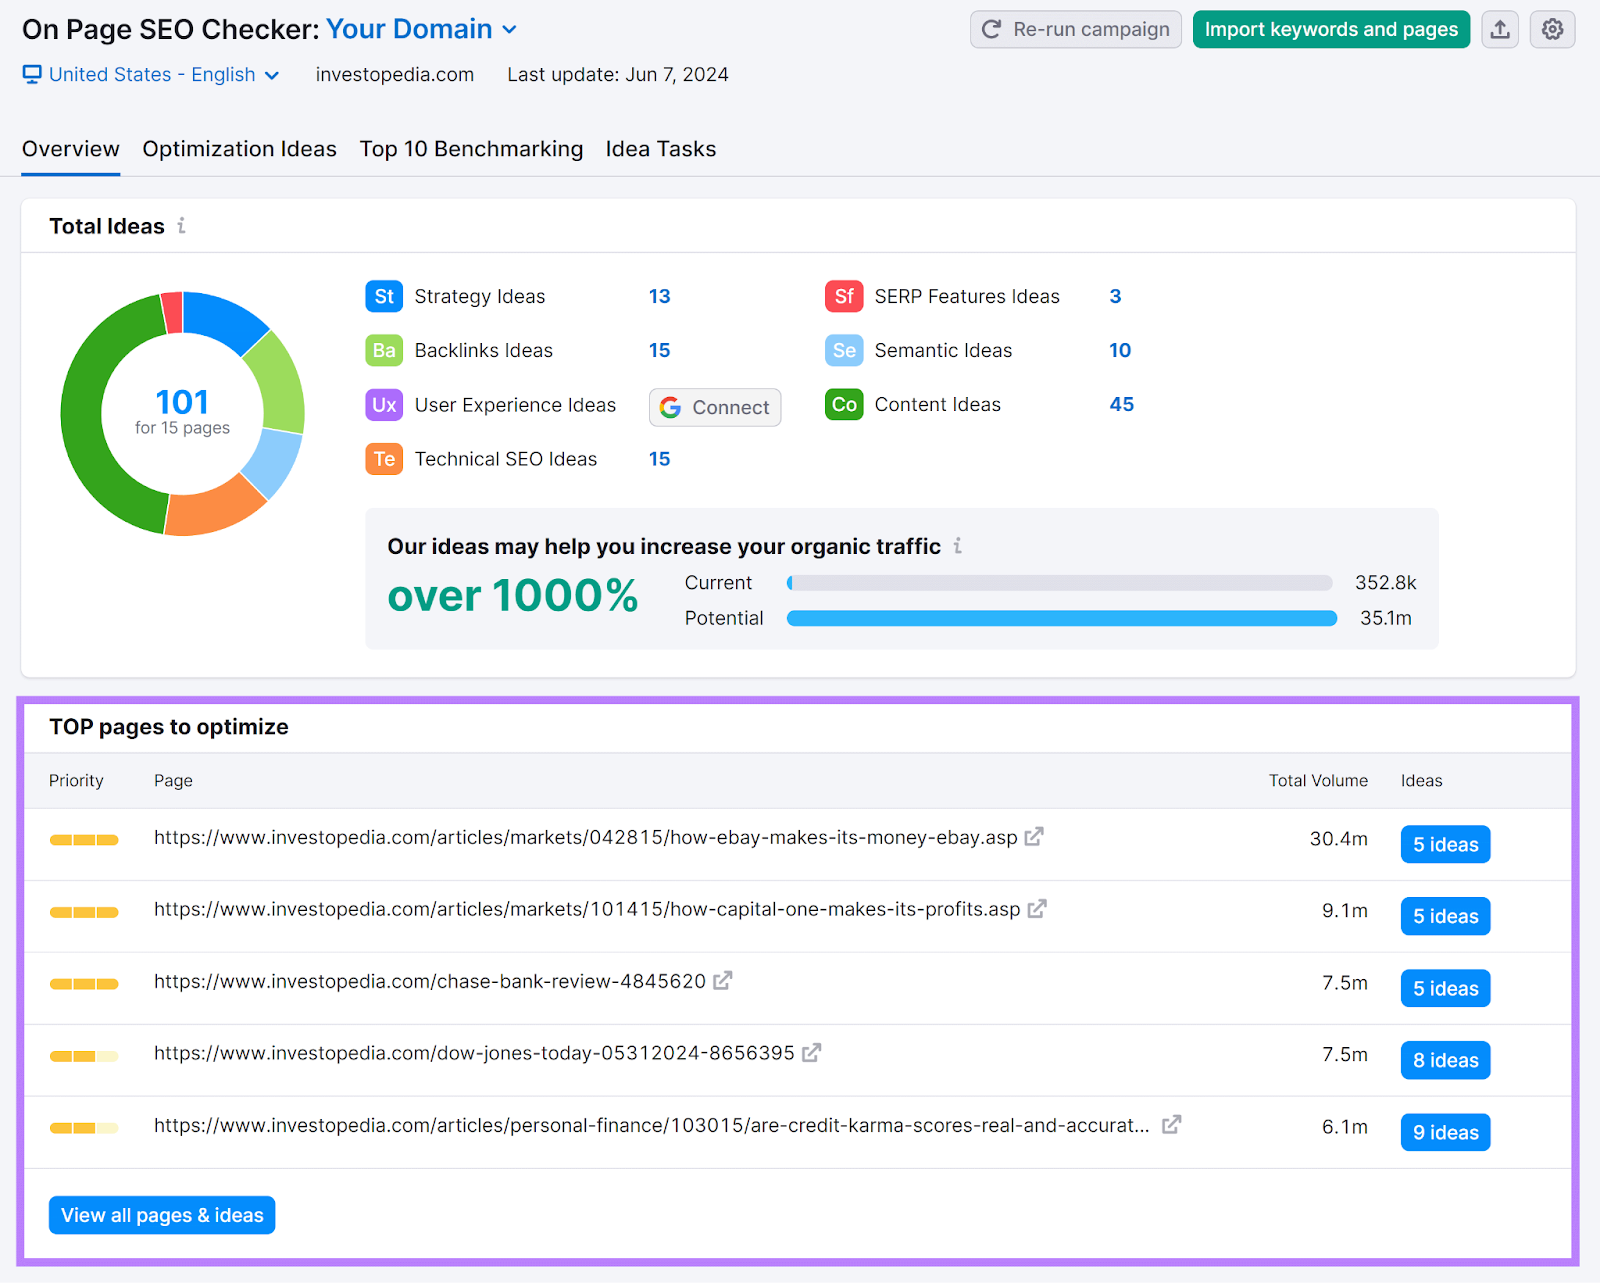
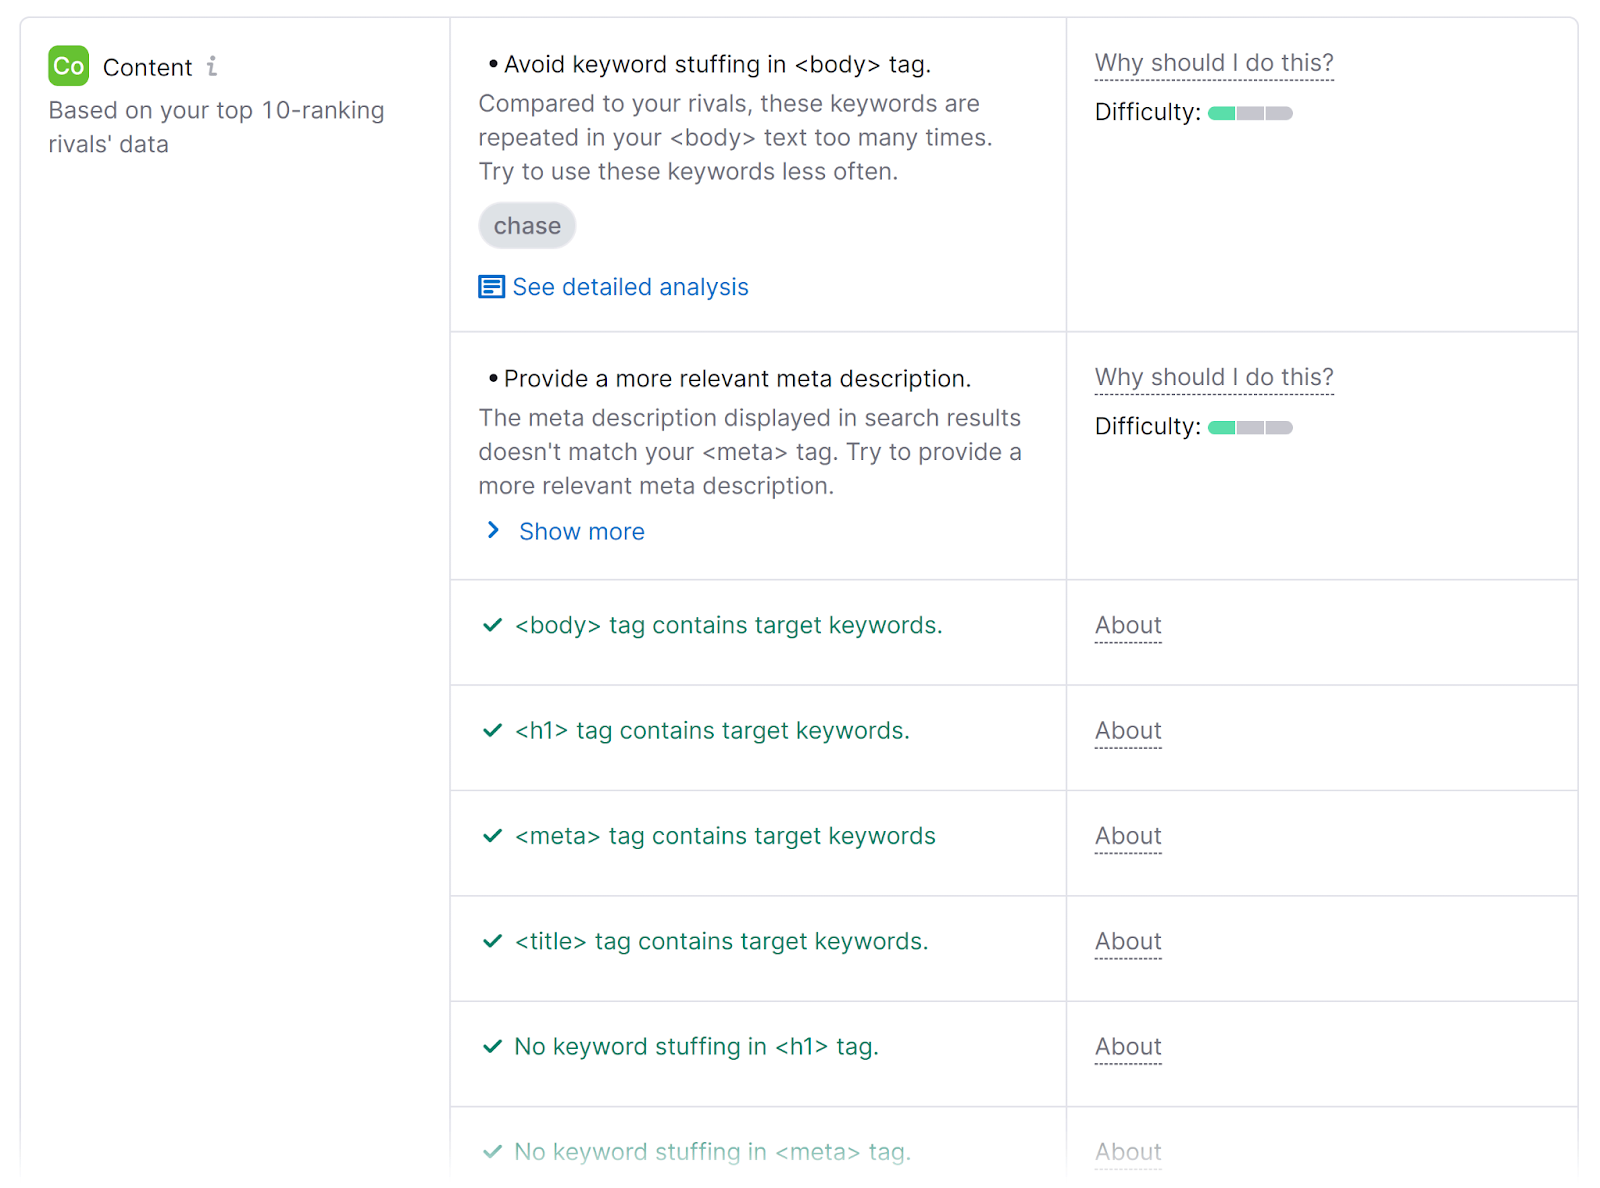
Then, click the “# ideas” button to see the suggestions for any post.
Here’s an example of ideas you might get:
Apply these ideas and the tips you’ve learned from this blog post formatting guide. Which will help you to maximize traffic, engagement, and conversions.